I make apps, take a look 👇

Beautiful images of code
Generate gorgeous, highly customizable images from your code snippets. Ready to save or share.
jekyll-admin is pretty convenient
Jekyll has been my go-to tool for all my websites for a few years now. From a technical perspective, it’s ideal:
- The server requirements are minimal (because it’s all statically generated).
- Hosting is relatively risk-free (because it’s all statically generated).
- It’s highly customizable and flexible.
- Jekyll plays nice with various front-end frameworks.
I could go on.
The two major downsides are deployment and creating content. The former because you’ll have to manually generate and deploy your site after each change. I’m aware that there are ways to improve this, but haven’t seriously tried any yet. Creating content is cumbersome because you’ll have to create a new file (or rather copy an existing post or page) and edit its content in your prefered Markdown editor. I enjoy writing pots in Vim, but having to manually create a file, add the proper metatags etc. keeps me from adding quick entries.
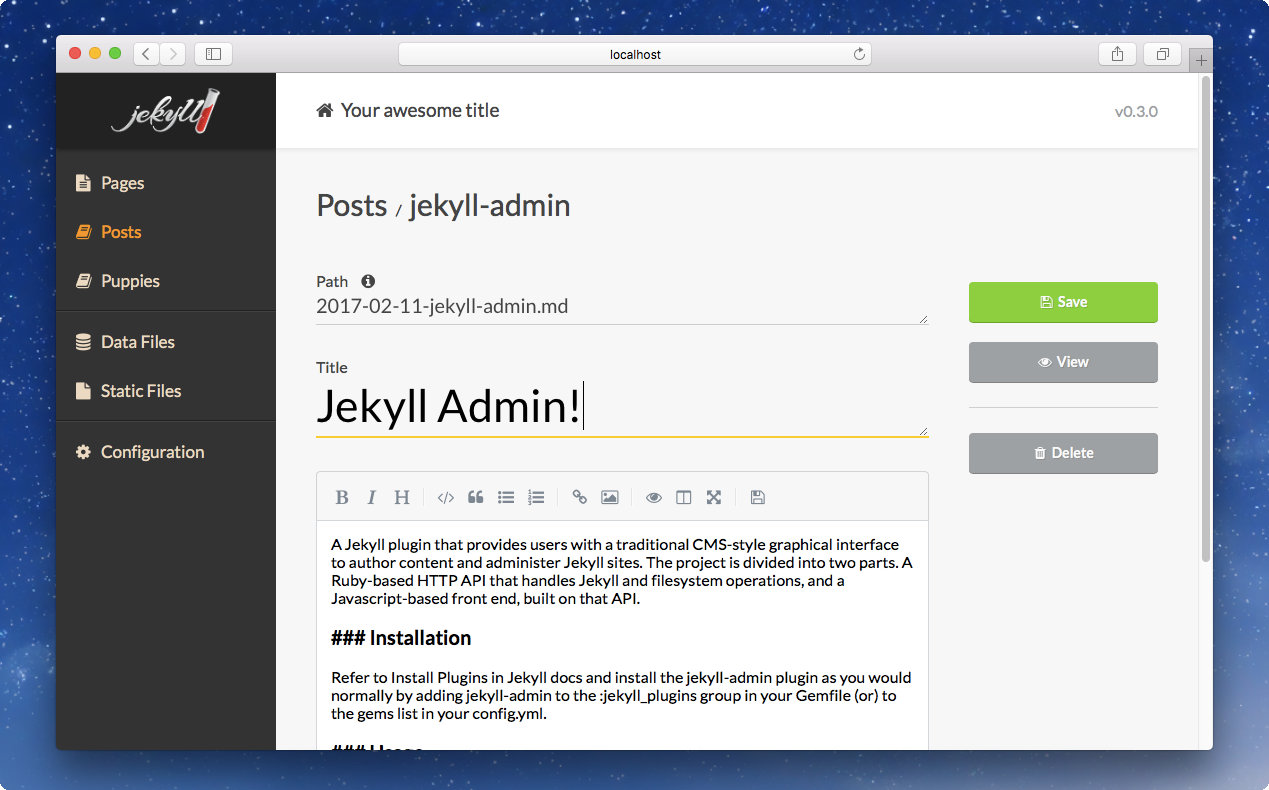
Today I came across jekyll-admin.
A Jekyll plugin that provides users with a traditional CMS-style graphical interface to author content and administer Jekyll sites.
Benefits
It takes away many of the manual labor involved in creating a new post and introduces an easy to use interface to write content. I’m using it to jot down this entry and I could easily get used to this.
- The WYSIWYG editor is nice, eventhough I’ve used the Markdown tags enough to not depend on the buttons provided.
- Adding a new post is accomplished by pressing a single button.
- Previewing is another press of a button.
Small improvements, but I welcome anything that lowers the threshold to start writing. The installation takes about ten seconds:
Installation
Add the following to your site’s
Gemfile:gem 'jekyll-admin', group: :jekyll_pluginsRun
bundle install
Downsides
Vim shortcuts are not available, obviously. Maybe I’ll end up just using the UI to create posts, then do the writing in a terminal window.
Another thing – that honestly feels like a bug – is that the metatags have to be entered from scratch, for each post. It’s worth the effort to go in and see if I can add my prefered behavior to the project.Update: The admin interface automatically picks up on the front matter defaults. Simply adding the following few lines to the
_config.ymlfile will prefill the corresponding fields in the content management system.defaults: - scope: path: '' type: posts values: layout: 'post' tags: [] - scope: path: '' type: pages values: layout: 'page' menu: true menu_title: ''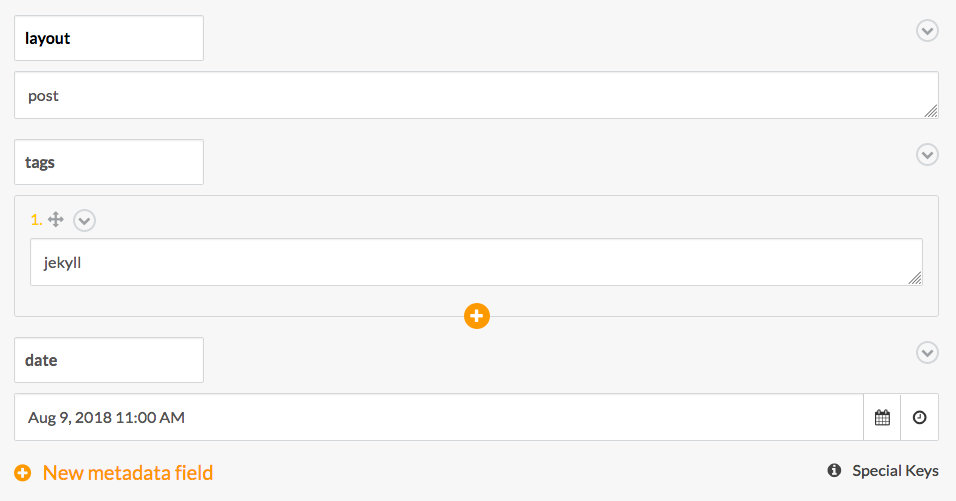
Conclusion
This is hardly a thorough review; all I did is write this signle post. The added convenience is undeniable, though. I’m positive jekyll-admin will help me to post more often. Famous last words.
Install and use pip without sudo
I’m used to installing and running my Ruby gems in user space with the help of
rbenv. I wasn’t aware of a similar setup for Python, until today.This Gist by Matthew guides you through all the steps you need to take. It’s quite simple, really.
# Uninstall sudo-requiring pip (only if pip is already installed)
sudo pip uninstall pip

# Download pip
curl https://bootstrap.pypa.io/get-pip.py -o ~/Downloads/get-pip.py

# Install pip with the --user argument
python ~/Downloads/get-pip.py --user

# Add Python's bin folder in ~/Library to your PATH environment variable
echo 'export PATH="$HOME/Library/Python/2.7/bin:$PATH"' >> ~/.bashrc

# Reload your config
source ~/.bashrc
Matthew mentions to remember to append
--userwhen installing modules:$ pip install <package_name> --userSome lubrication all but silences your Dreamcast
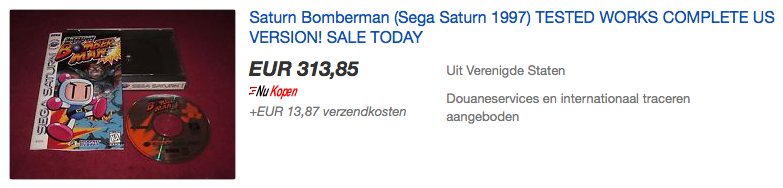
I recently purchased a Japanese Dreamcast, after getting a Japanese Sega Saturn before. They’re pretty great. The main benefit being cheap hardware and relatively inexpensive games. Here’s a pretty good example, check out these two Saturn Bomberman games:

Anyway, the downside of getting a Japanese Sega Dreamcast, is that it is loud. Extremely loud. Just listen to it:
After switching mine on for the first time I was convinced it was broken. PAL Dreamcast aren’t exactly whisper quiet, but this is something else.
Luckily there’s a way to reduce this dramatically. This video by Mark Fixes Stuff goes over the process of lubrication the gears in the Dreamcasts’ GD-ROM drive. Disassembling the device takes some time, but it’s a very straight forward process that pays off immensely.
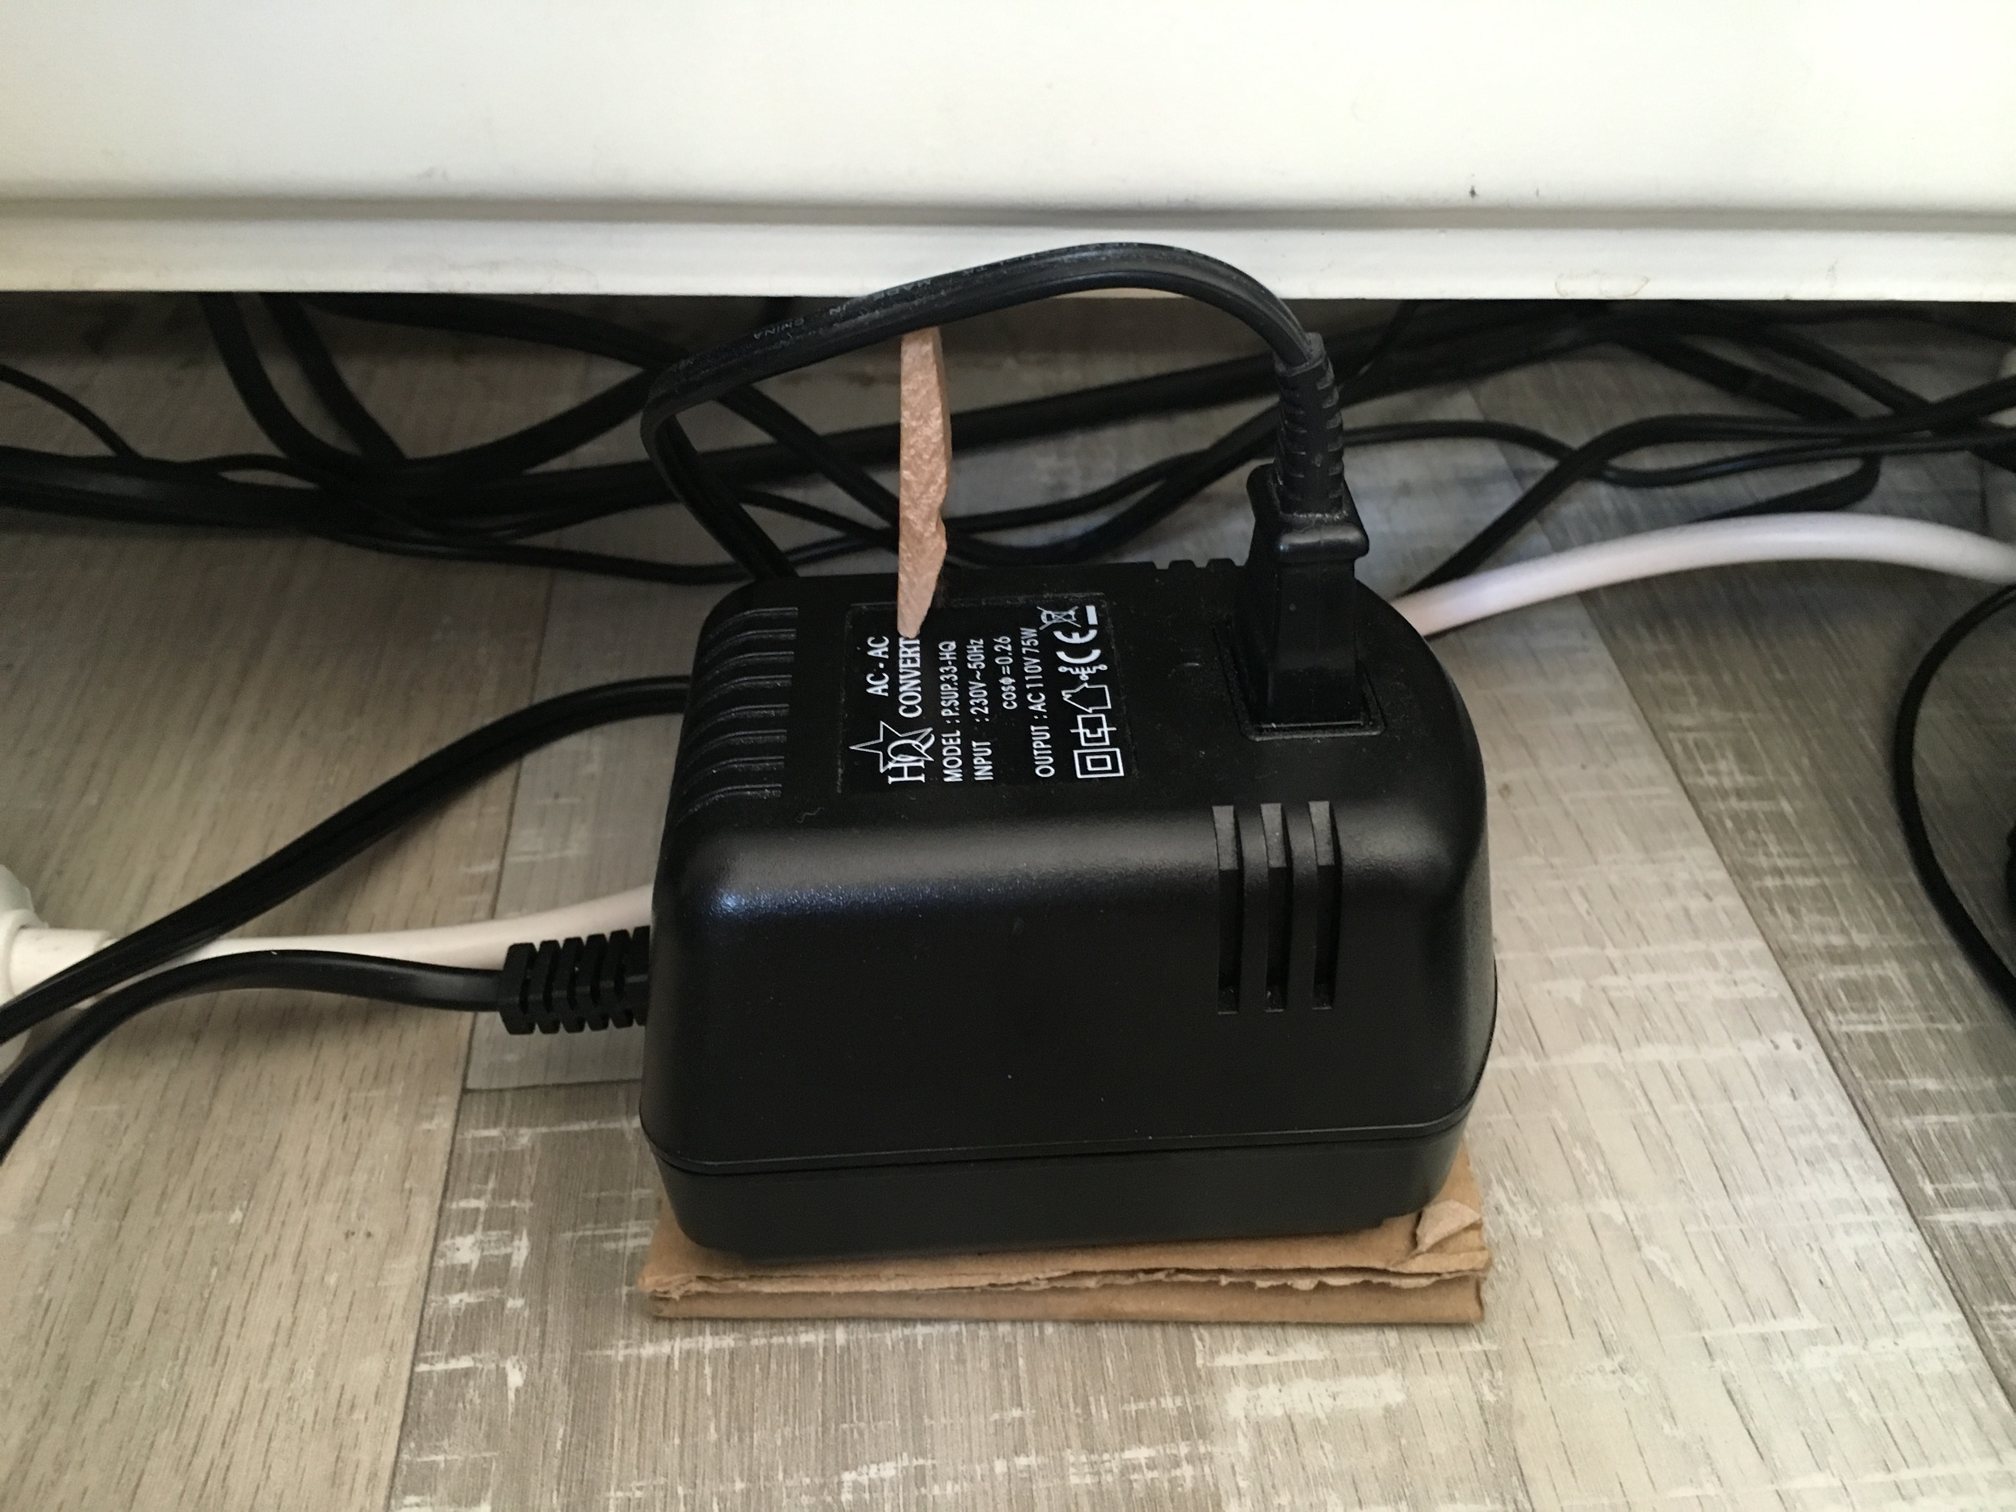
At the 18.48 second mark, you can hear the difference. Definitely worth the effort. If only my step-down converter (European 220V to Japanese 110V) could be silenced the same way… I currently use one half of a clothespin that’s wedged between a radiator and the converter in such a way that it presses down on a specific part of the container, which reduces the buzzing to a minimum.
While the Dreamcast was disassembled I also replaced the internal battery, so it saves the date information when it loses power (every time I turn off that horrible step-down converter).
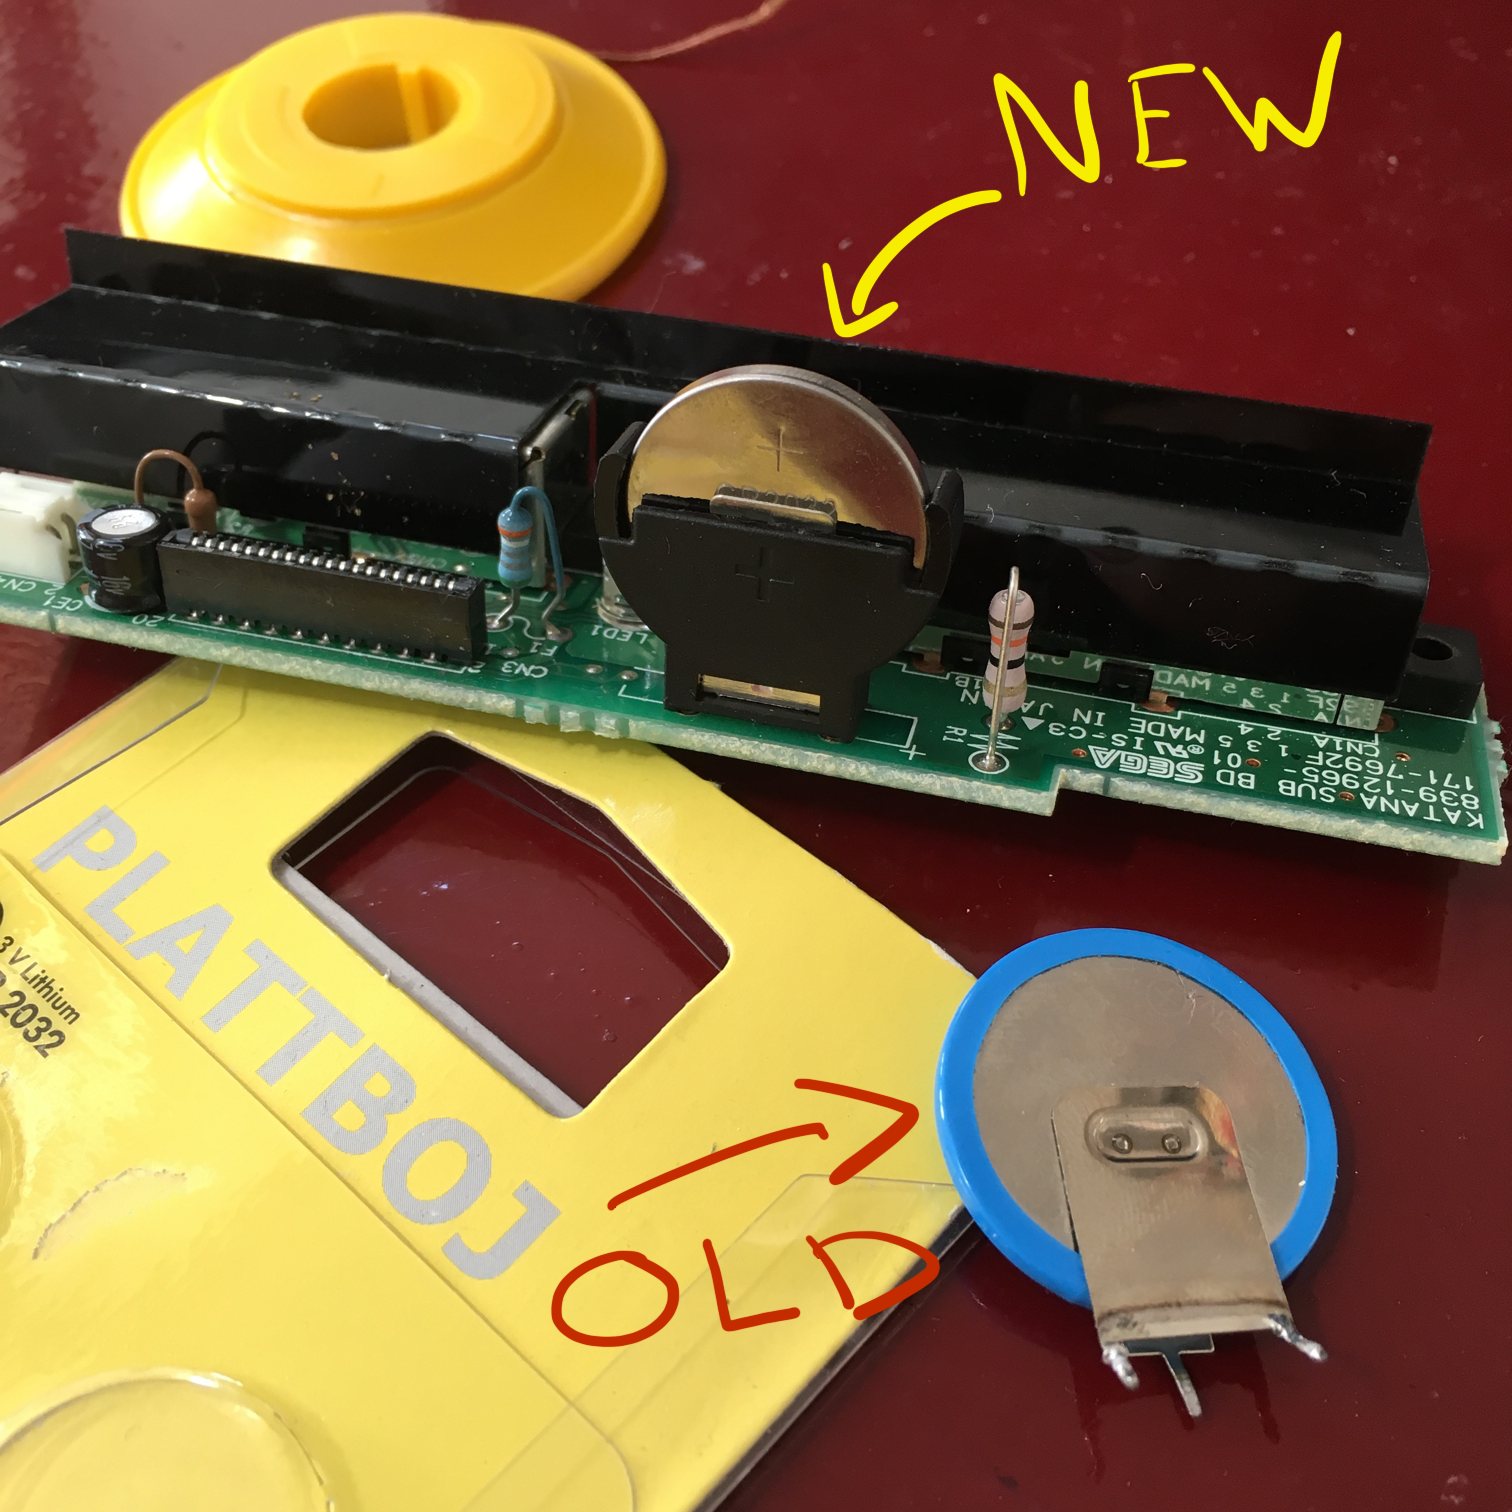
If you’re comfortable around a soldering iron, it’s a trivial procedure. Desolder three points and install one of these. Pro tip: don’t pay any more than a few cents for these vertical holders.
And that’s it, my Dreamcast runs pretty silent for a Japanese model and it remembers the date. 👌
To move your Time Machine backup to another disk, use Disk Utility
Update July 12th 2018
A reader let me know that since macOS 10.13.4 (at least) Finder’s copy behavior has changed and will respect hard links. This means that the backup will no longer dramatically increase in size. It will still take hours “Preparing to Copy”, though.
I’ve not tested this, and until I do my recommended way of copying a Time Machine backup is still using Disk Utility. If you’re feeling adventurous however (and have a bunch of time to spare), you might want to give Finder a go first.
Time Machine is a great way to store incremental backups of your Mac. It’s pretty efficient too, using only a relatively small amount of disk space. Still, there are reasons to switch your Time Machine backup to another drive. Maybe your disk is showing signs of failure, or it’s simply running out of space. Moving your backup is not as easy as it seems though.
I have several backup disks and was using them rather inefficiently, that’s why I wanted to move my Time Machine partition to a new disk. After trying several ways to make this happen, I’ve come to the conclusion that using Disk Utility is the only reliable method. But first, let’s go over every method I’ve tried that didn’t work:
Finder (takes a long time, increases size)
Apple actually recommends using Finder to move or copy a Time Machine backup, by simply dragging the
Backups.backupdbto another drive. These are the steps they tell you to take:- Check the format of your new backup drive.
- Set permissions on your new backup drive.
- Temporarily turn Time Machine off.
- Copy your backup data from your original drive to your new drive.
- Set Time Machine to use your new drive.
Things will go differently than you might expect on step 4 though. First, it’ll take many hours before Finder actually starts copying; it spends this time preparing to copy. And while it’s copying you’ll notice that the copy will grow a lot bigger than the original backup.
Terminal commands (increases size)
- Open a Terminal window (
/Applications/Utilities/Terminal.app). - Type in the following command (without the $ sign and replace [Time Machine Disk] and [Destination Disk] with the relevant paths in your setup):
$ cp -a "/Volumes/[Time Machine Disk]" "/Volumes/[Destination Disk]"This actually starts copying files straight away, but you’ll notice after a while that this method also increases the size of the copy several times over the original.
Funny story: I actually spent several hours copying files using
cp -rinstead ofcp -a. The-aparameter takes into account symbolic links and such, while-rdoesn’t. The backup would’ve been corrupted.Always copy folders and packages using
cp -a.
– Me, after wasting several hoursDisk Utility
This comes with a few downsides, but it actually gives you an exact copy of the original data.
Downsides
- You can only copy from a disk or partition to another disk or partition.
- The destination partition needs to be at least the same size of the original, probably a little bigger.
- It’s a little more complicated than simply dragging the
Backup.backupdbfolder to a new disk.
Upsides
- Relatively quick.
- The copy is the exact same size as the original.
Currently, it’s the only way I know to reliably move a Time Machine backup to another disk. I don’t understand why Apple advertises using Finder instead of using this. Anyway, here’s how it works:
- Open Disk Utility (
/Applications/Utilities/Disk Utility.app). - Check the format of your new backup drive. It needs to be a GUID partition and formatted as Mac OS Extended (Journaled).
- Temporarily turn Time Machine off.
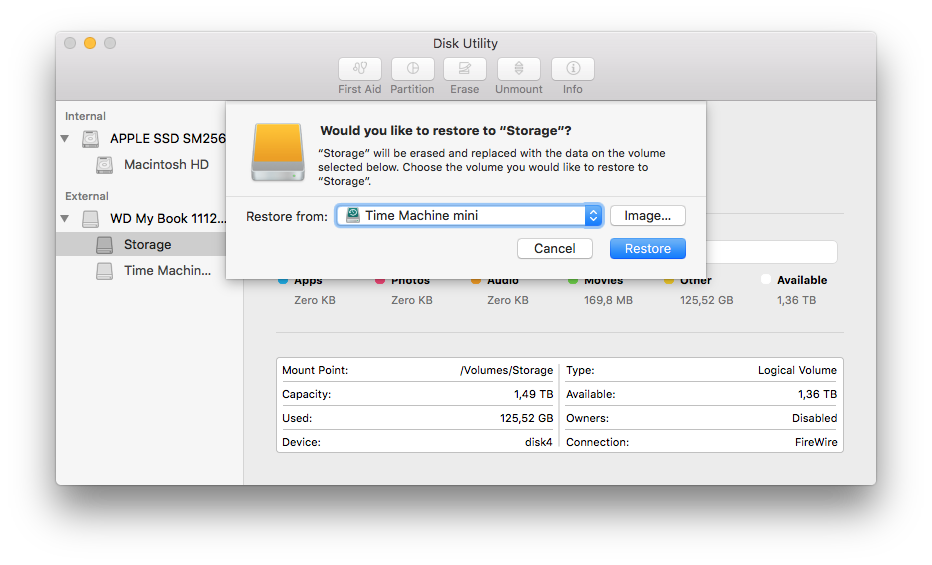
- In Disk Utility select the new backup drive.
- From the “Edit” menu item, select “Restore…”.
- In the menu that pops up select the original Time Machine drive.
- Wait…
- Set permissions on your new backup drive. Get Info on the new drive in Finder and make sure “Ignore ownership on this volume” at the bottom of the “Sharing & Permissions” section of the Get Info window is unchecked.
- Go into Time Machine and select your new drive to backup to.
And that’s it, you now have an exact copy of your Time Machine backup on another drive. 👌
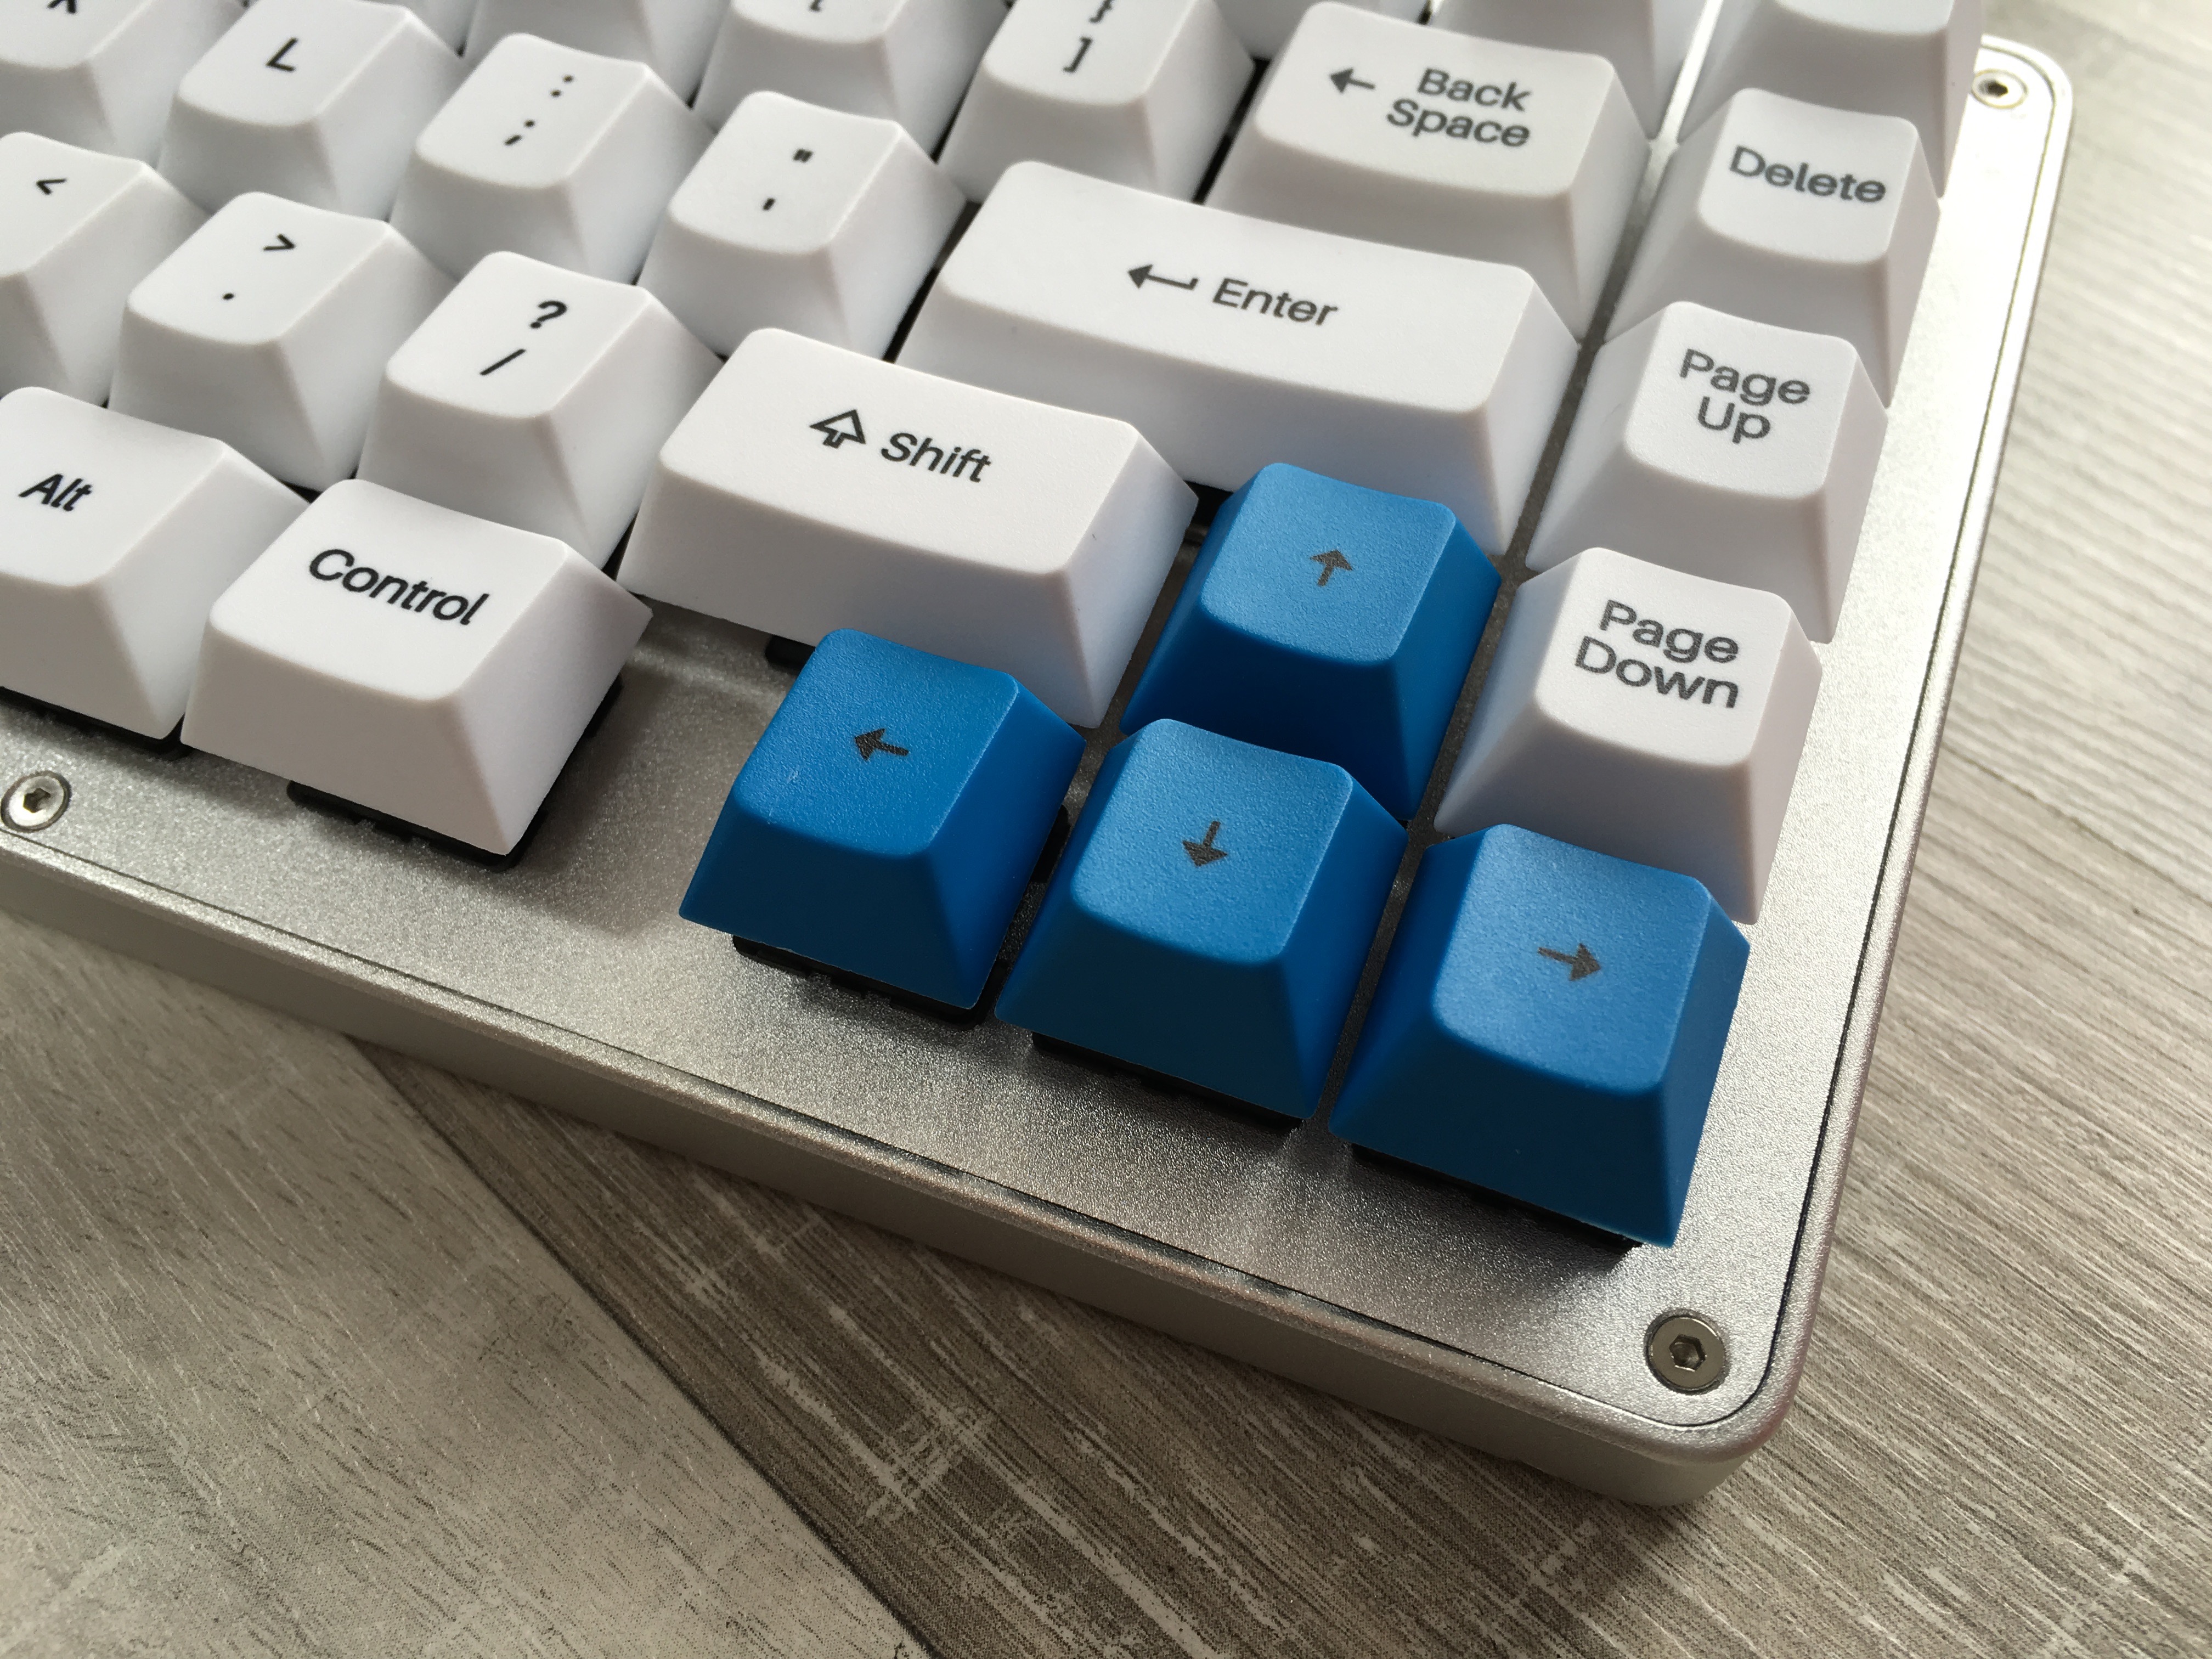
Matt3o's Whitefox keyboard was worth the wait
They say you shouldn’t skimp on a great mattress, because you spend so much time with it. As someone who writes (code) for a living, the same could be said about a keyboard.
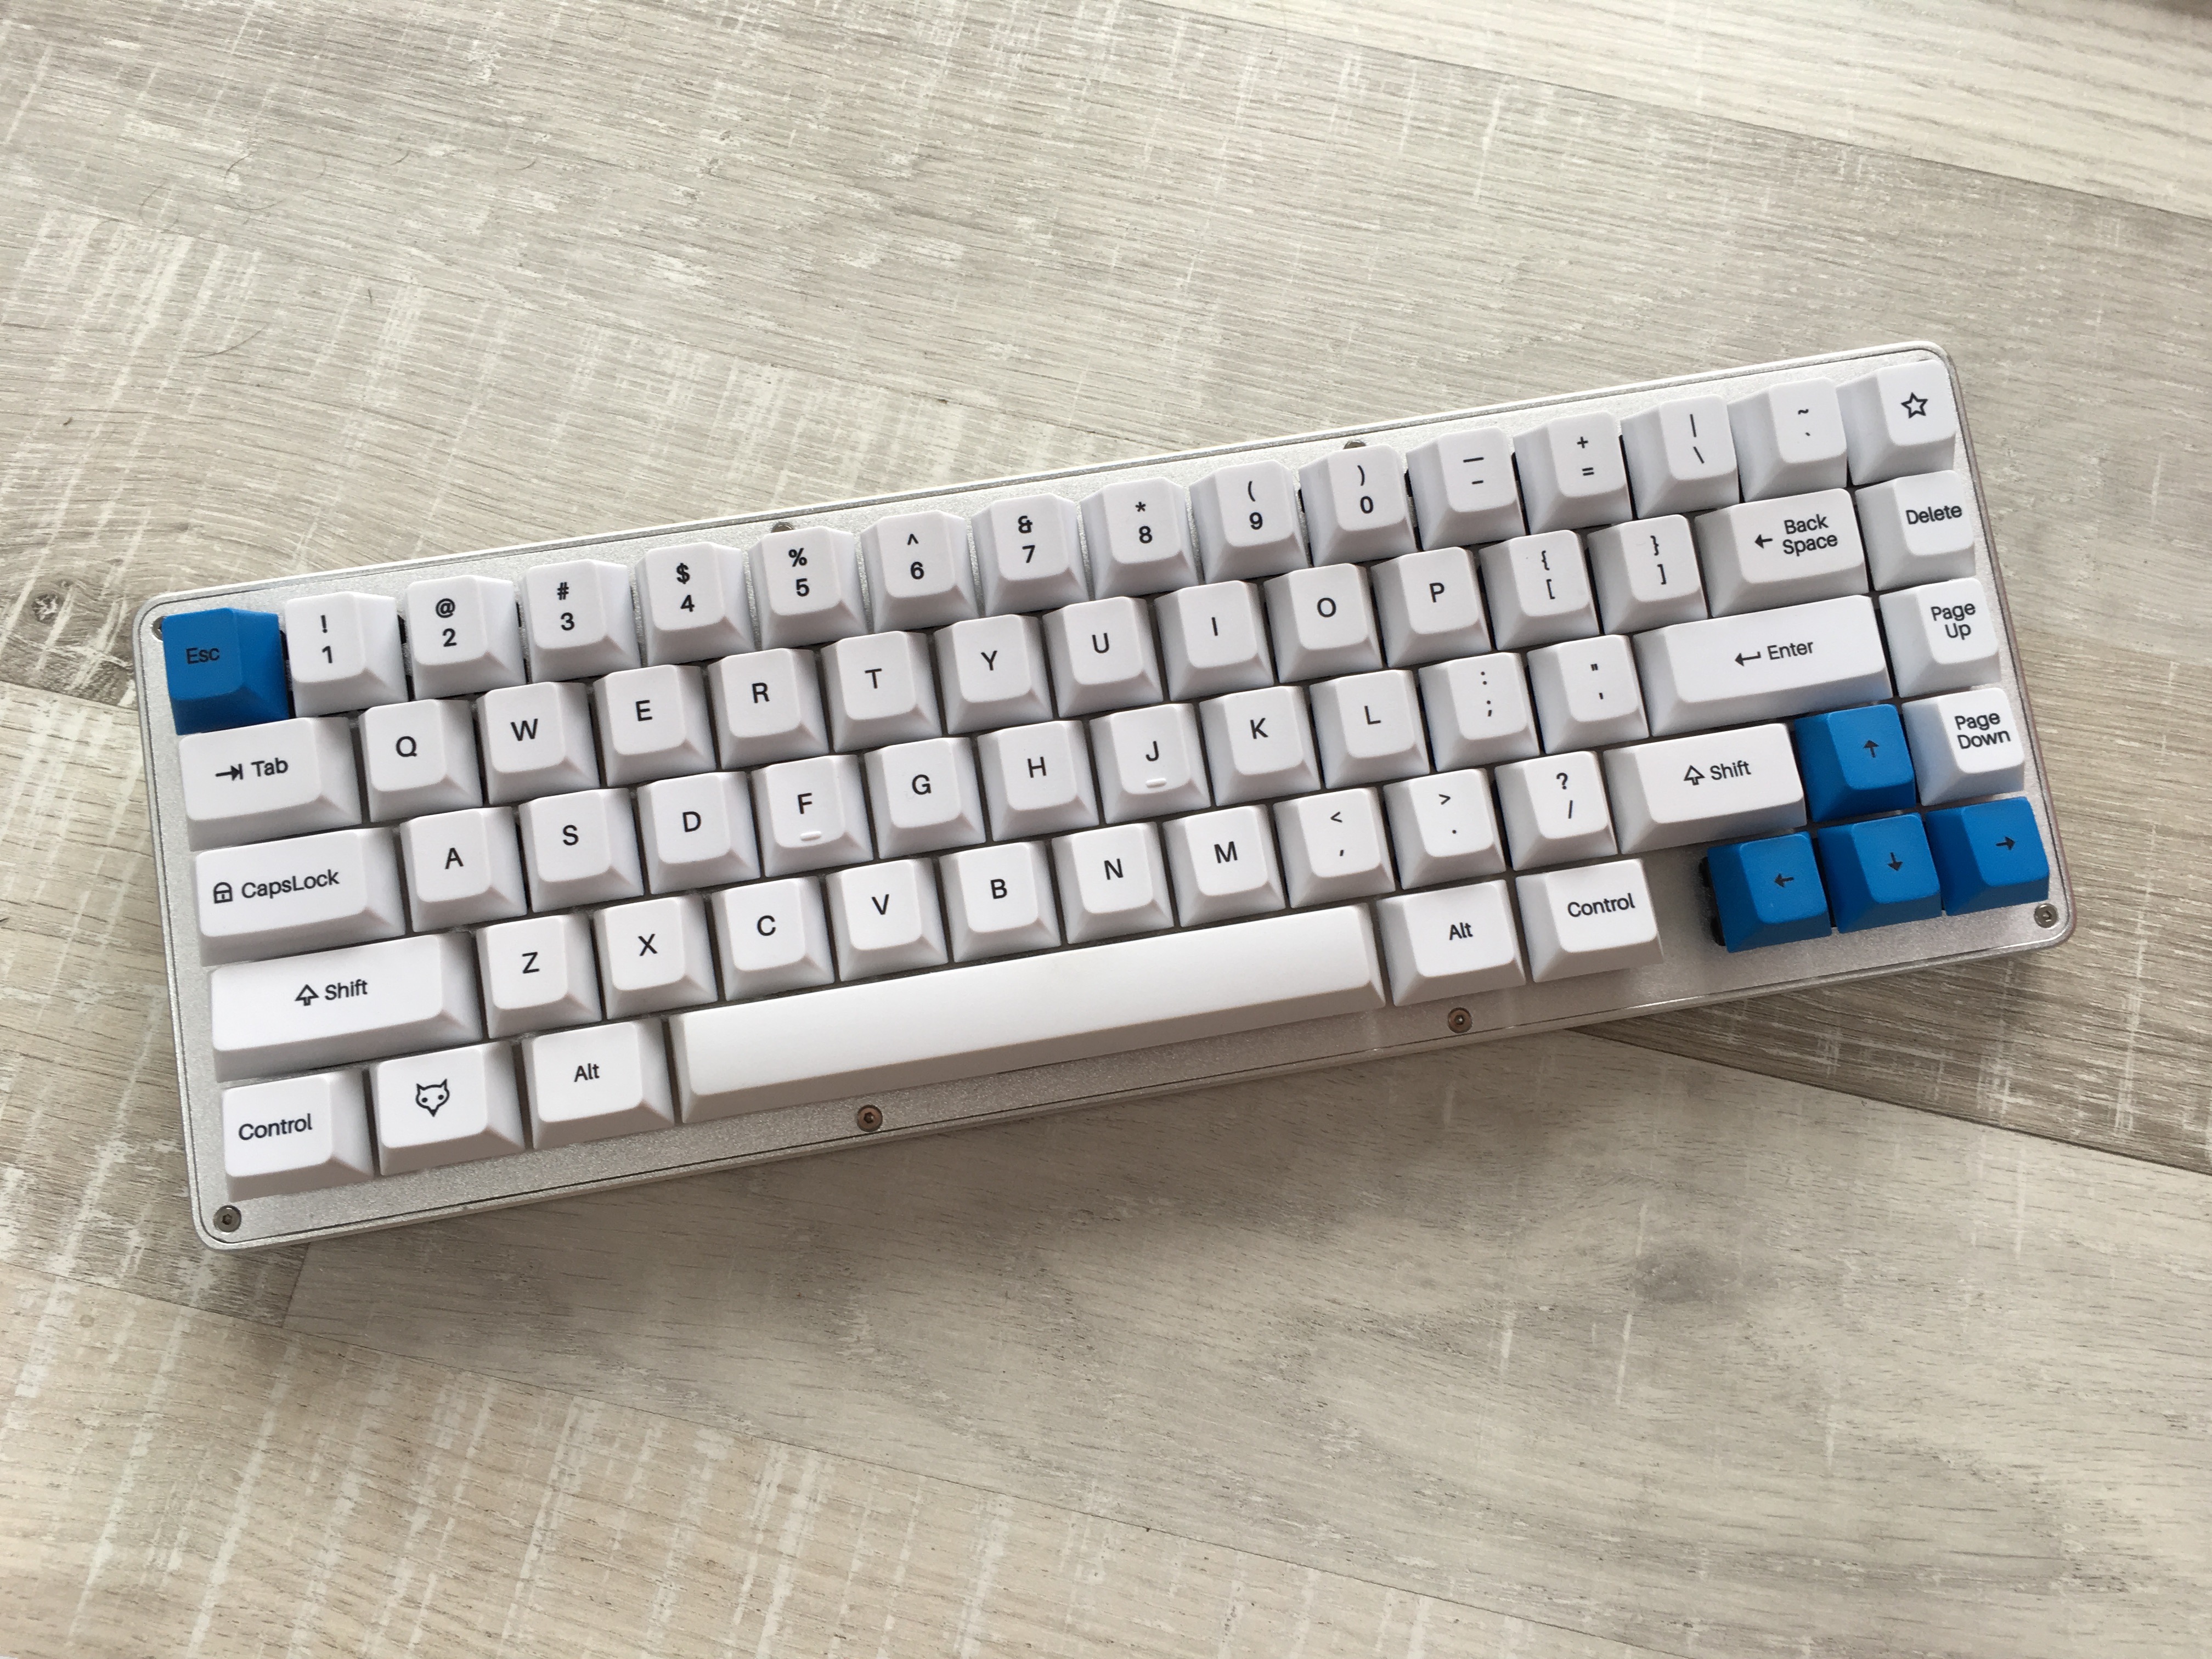
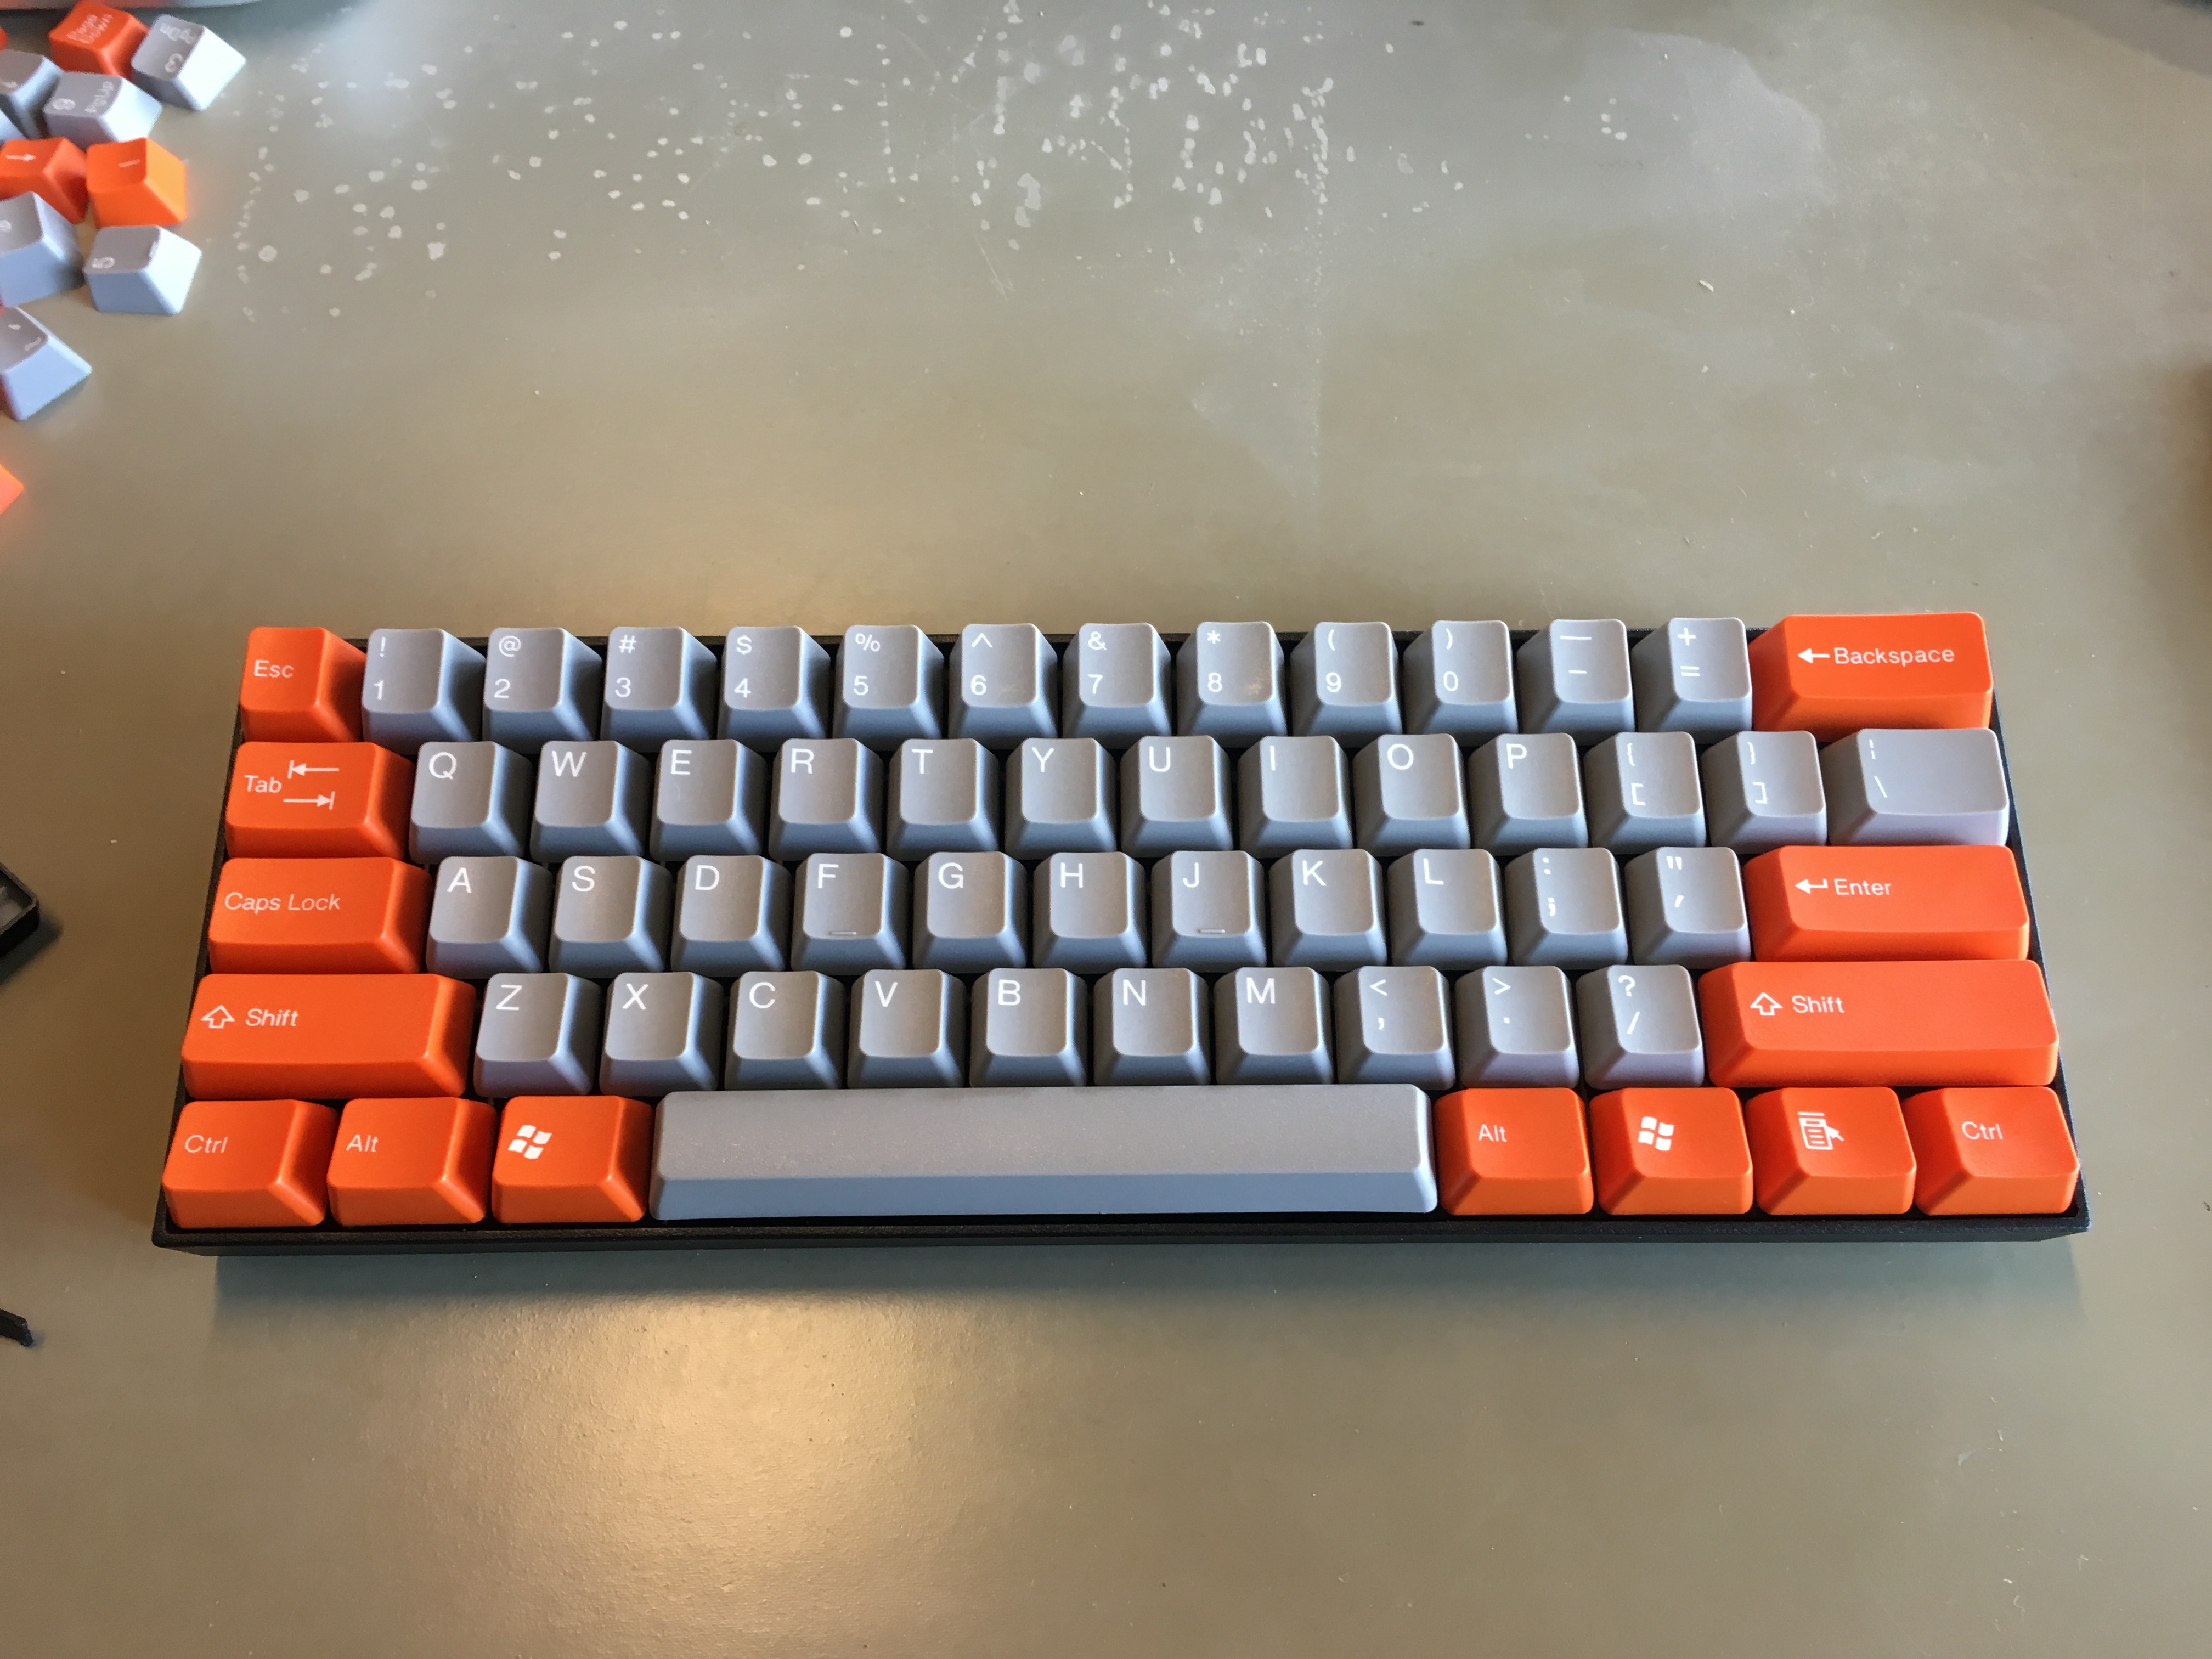
After much anticipation, I’m delighted to be able to type this article on the Whitefox keyboard designed by Matt3o.
Packaging
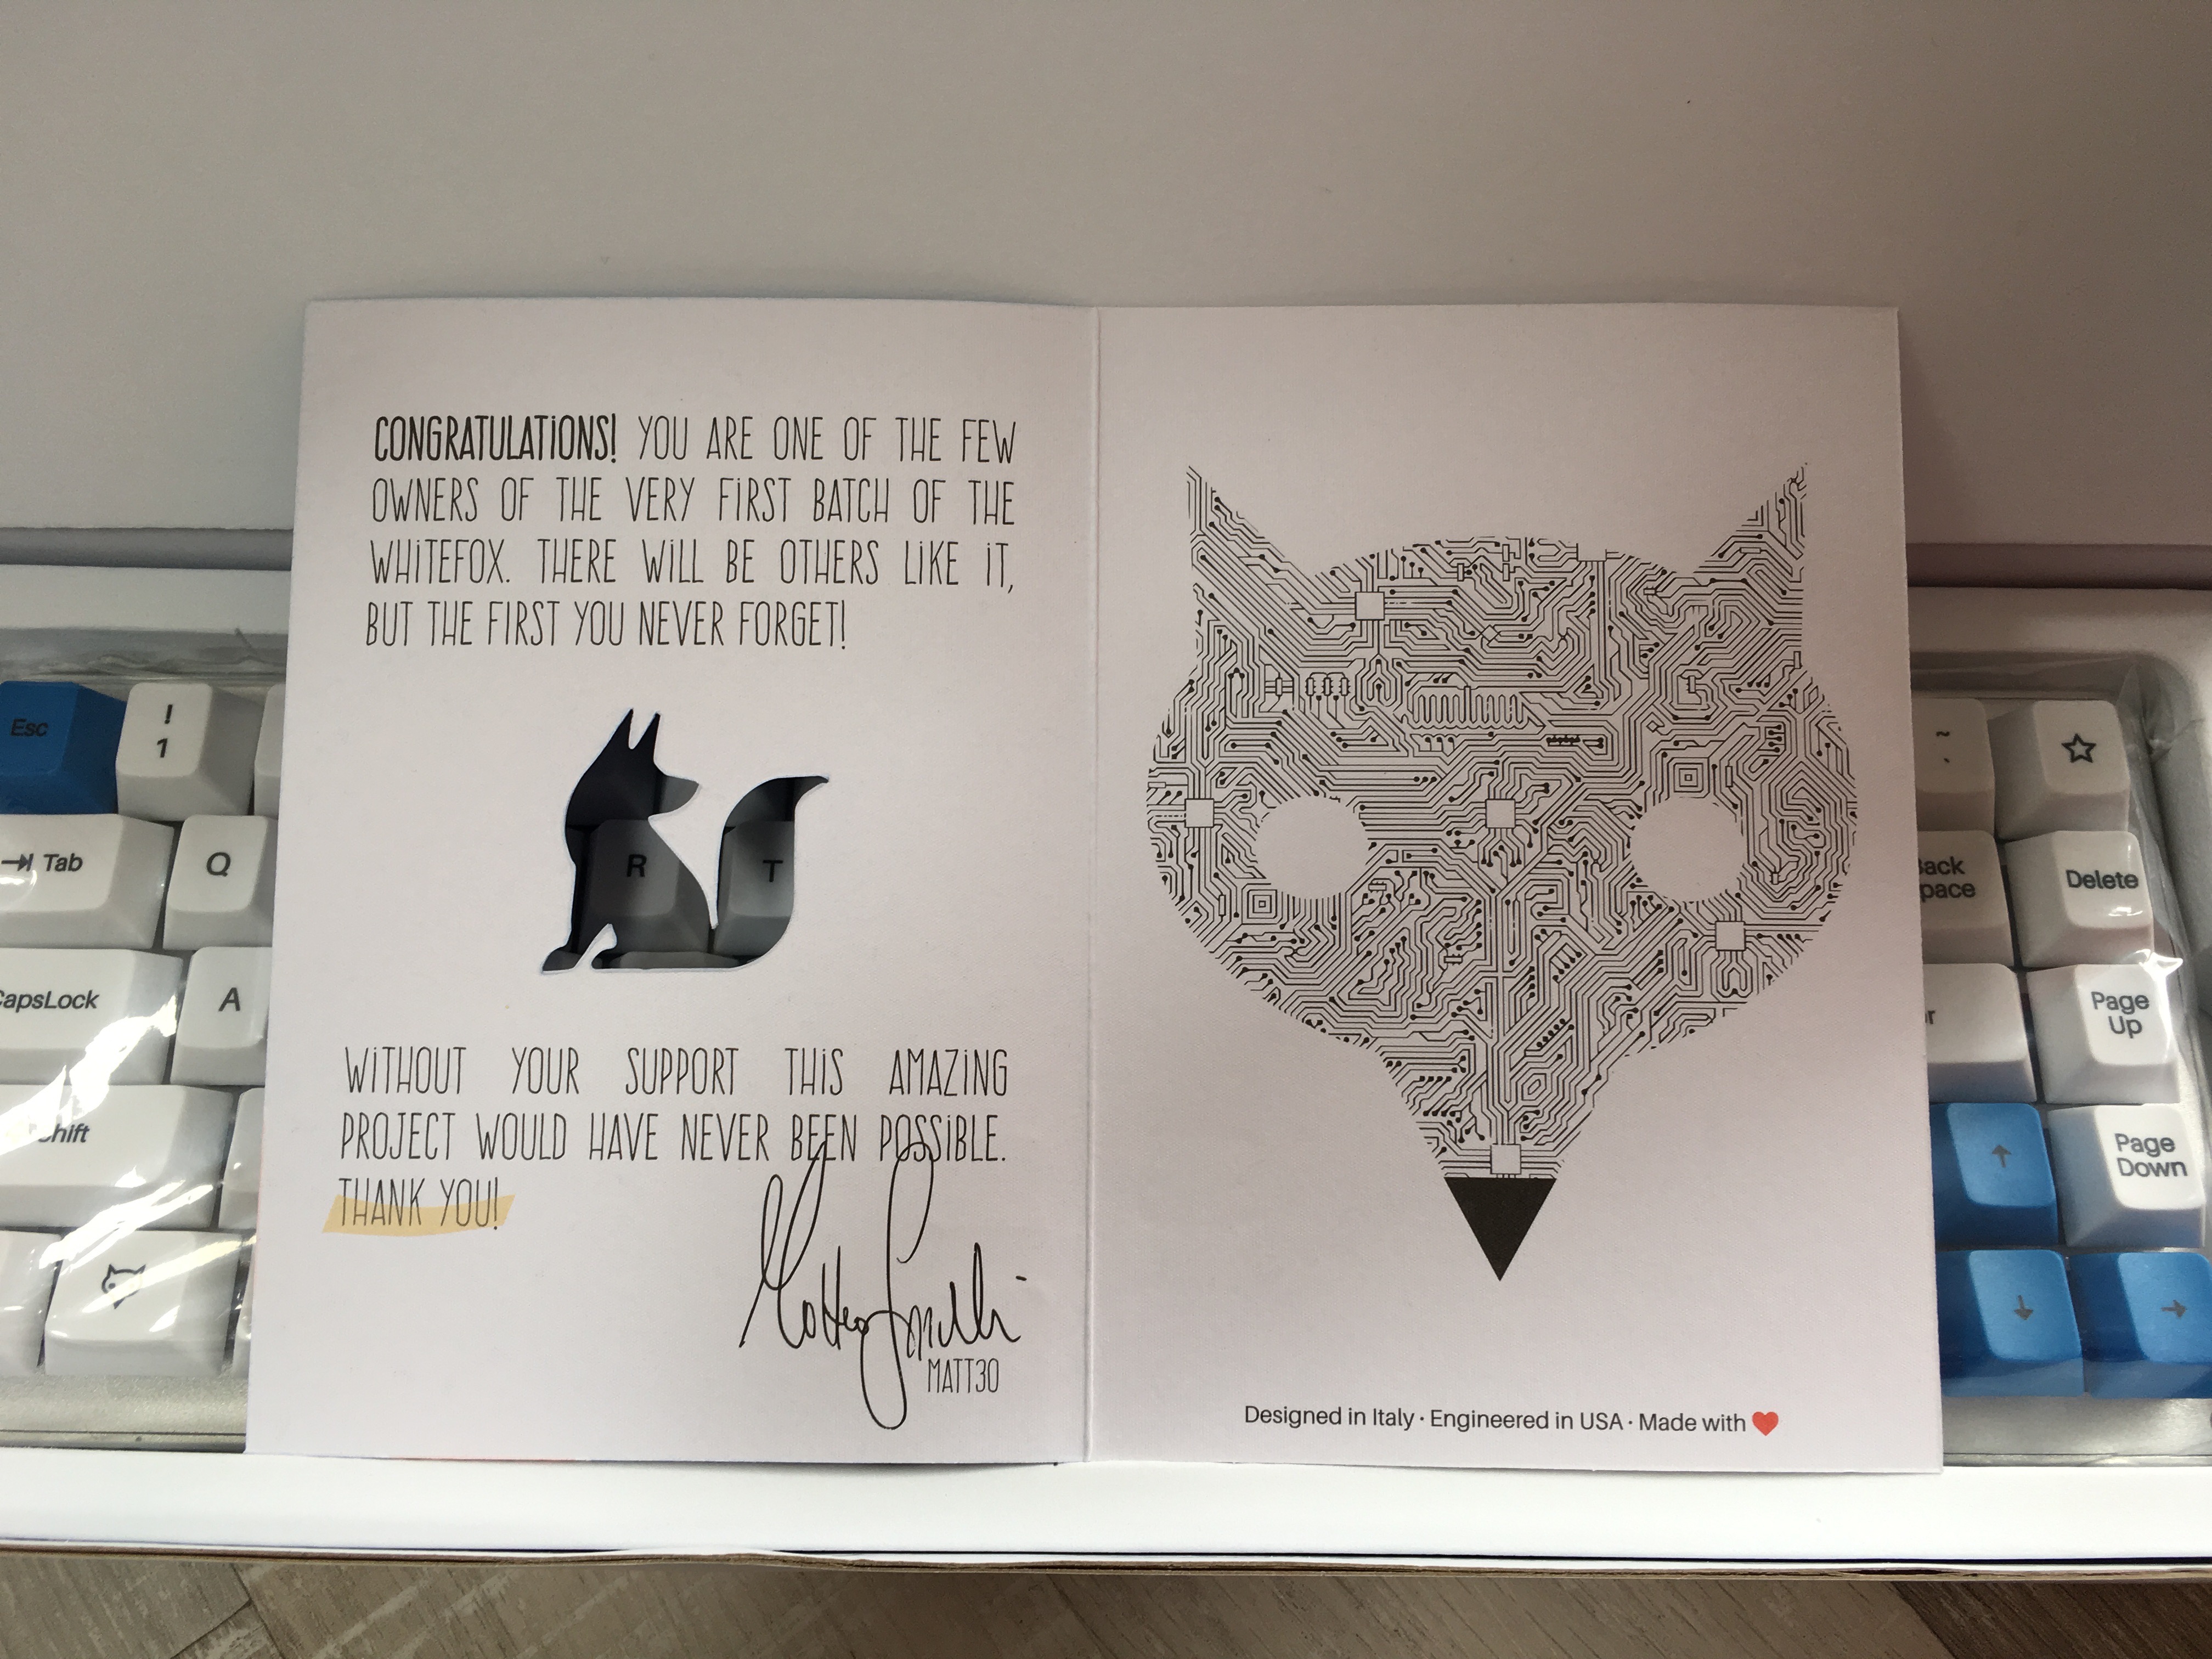
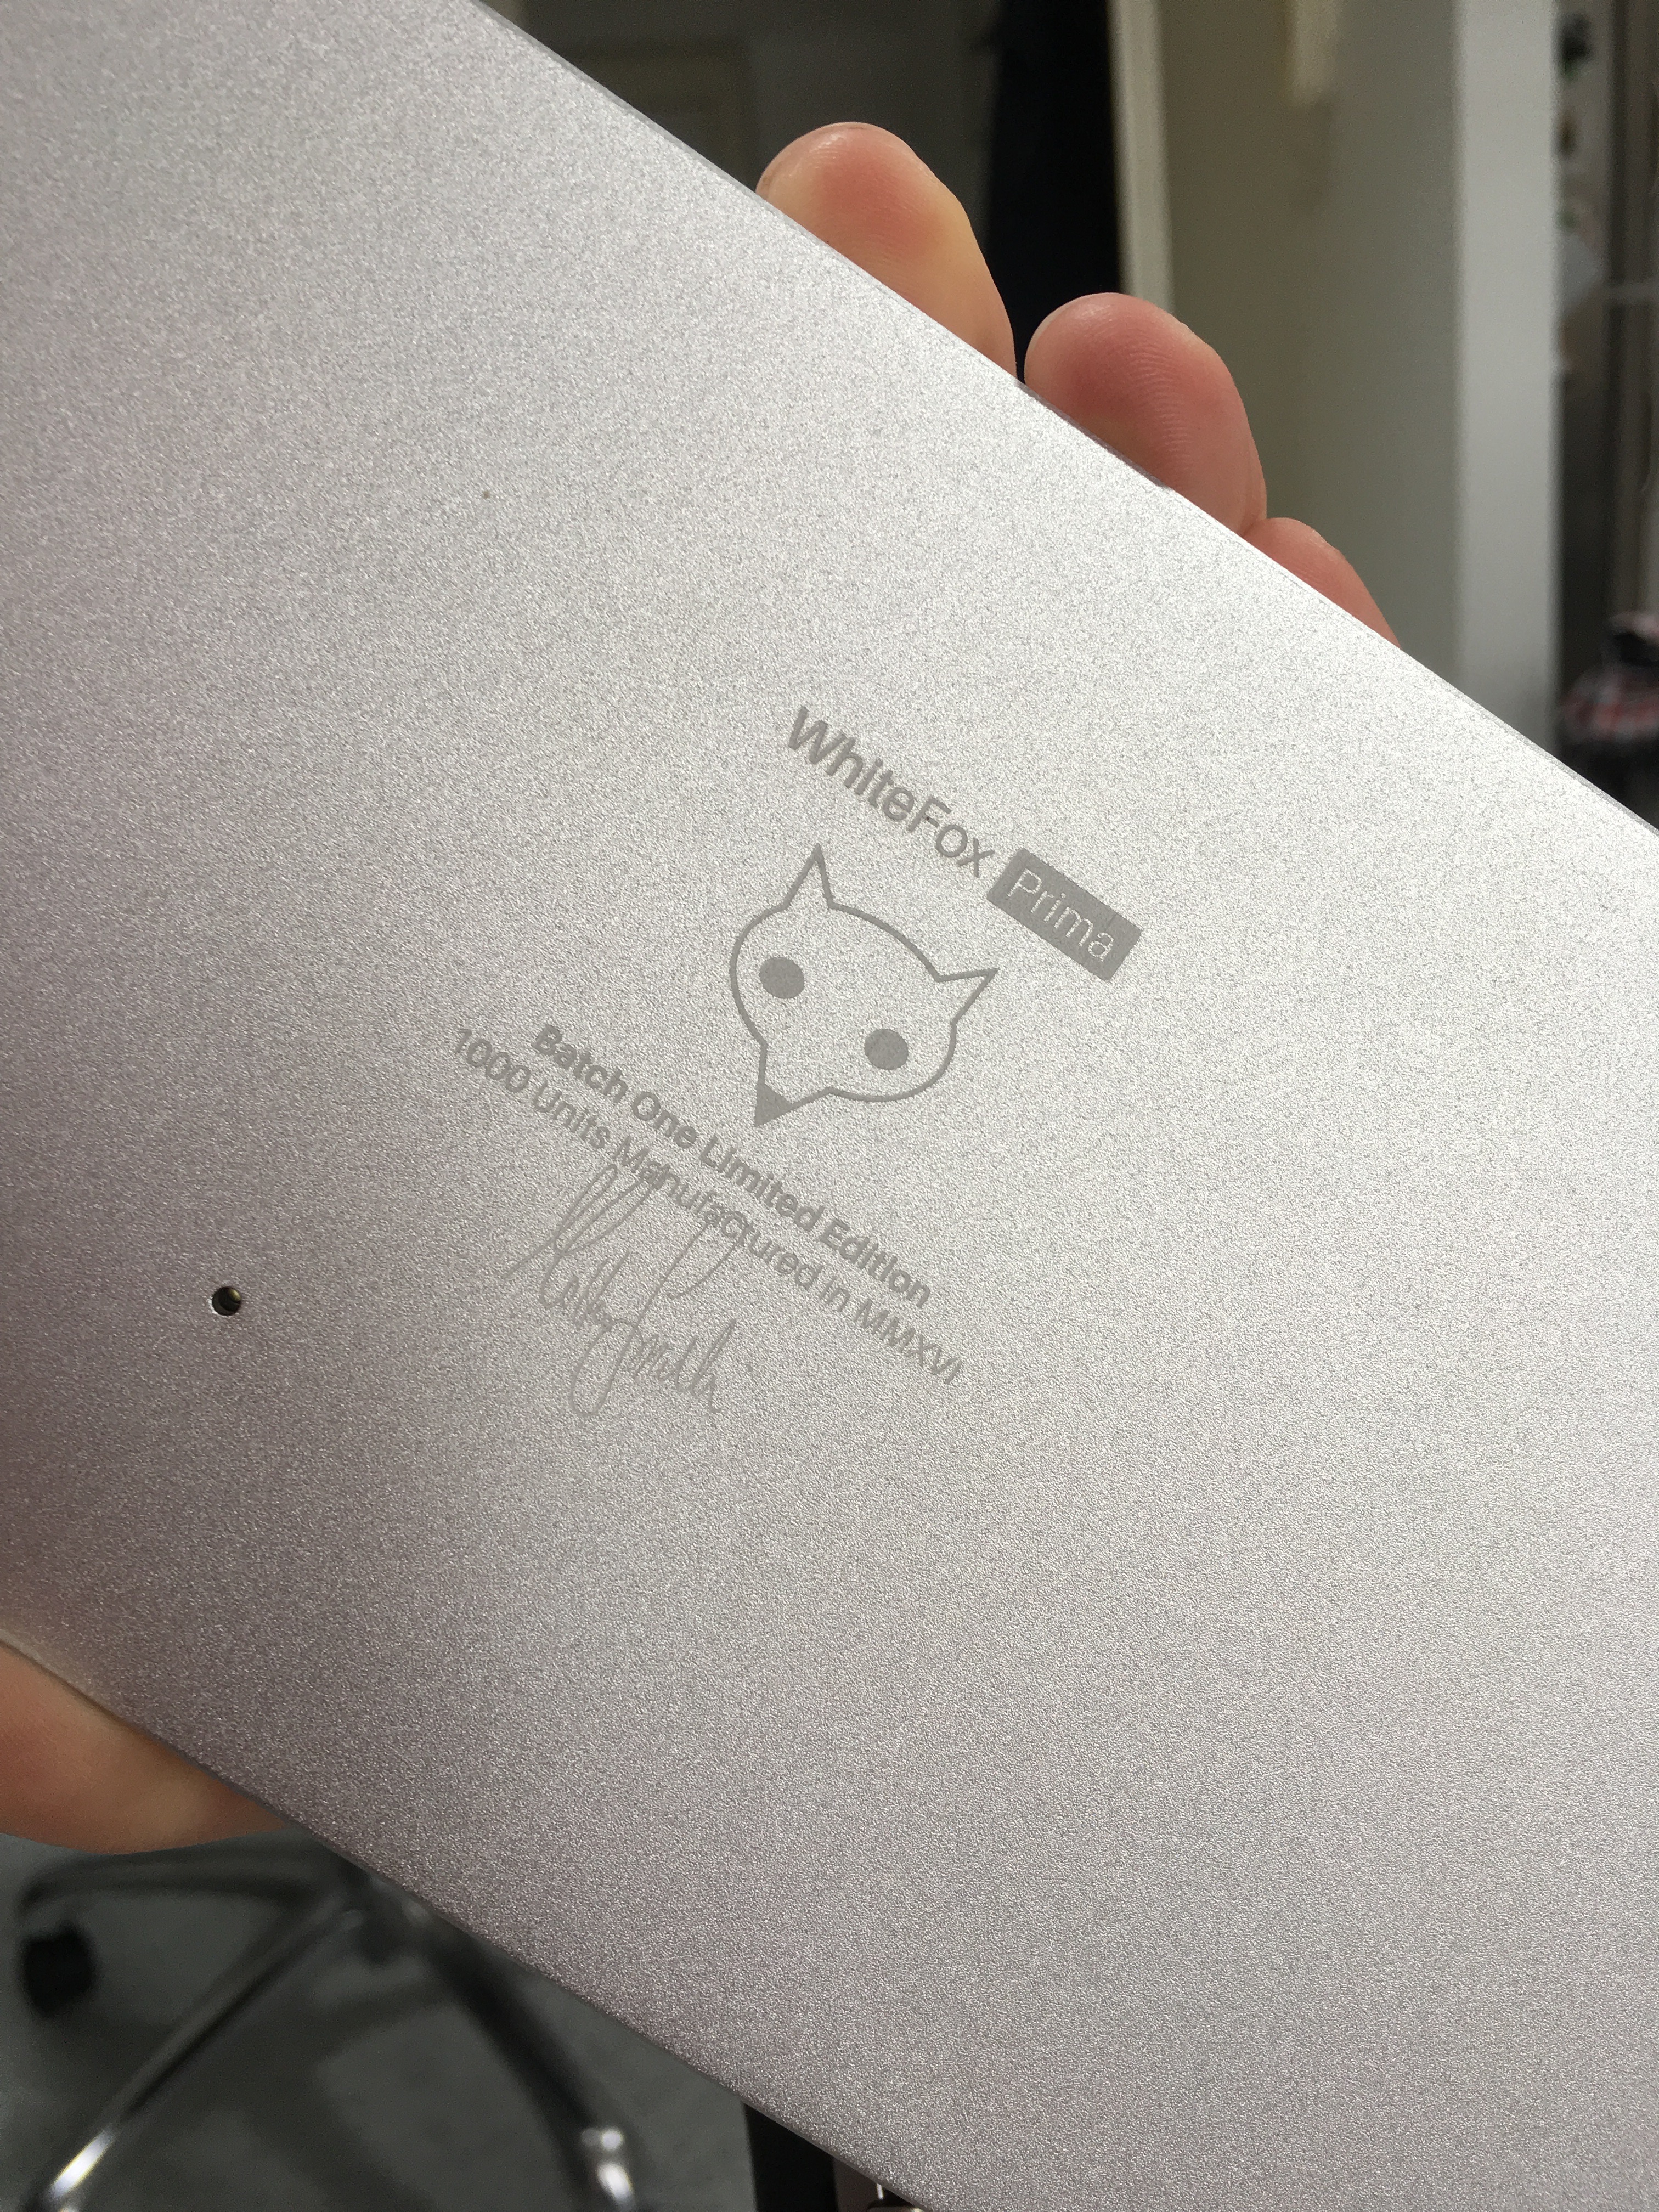
The packaging and setup is special. It came in an almost completely white box, with a small note inside. It’s mentioned a few times that this is the first batch of Whitefox keyboards and that more are on the way.
The blue and white USB cable came included with the keyboard. Also in the box are feet and a few pads to raise the keyboard at a more comfortable angle and stop it from moving around. The board needs to be opened up to install the raised feet. This might seem cumbersome, but knowing the keyboard’s build-it-yourself heritage, this is actually a cool detail. The inside looks as brilliant as the outside.
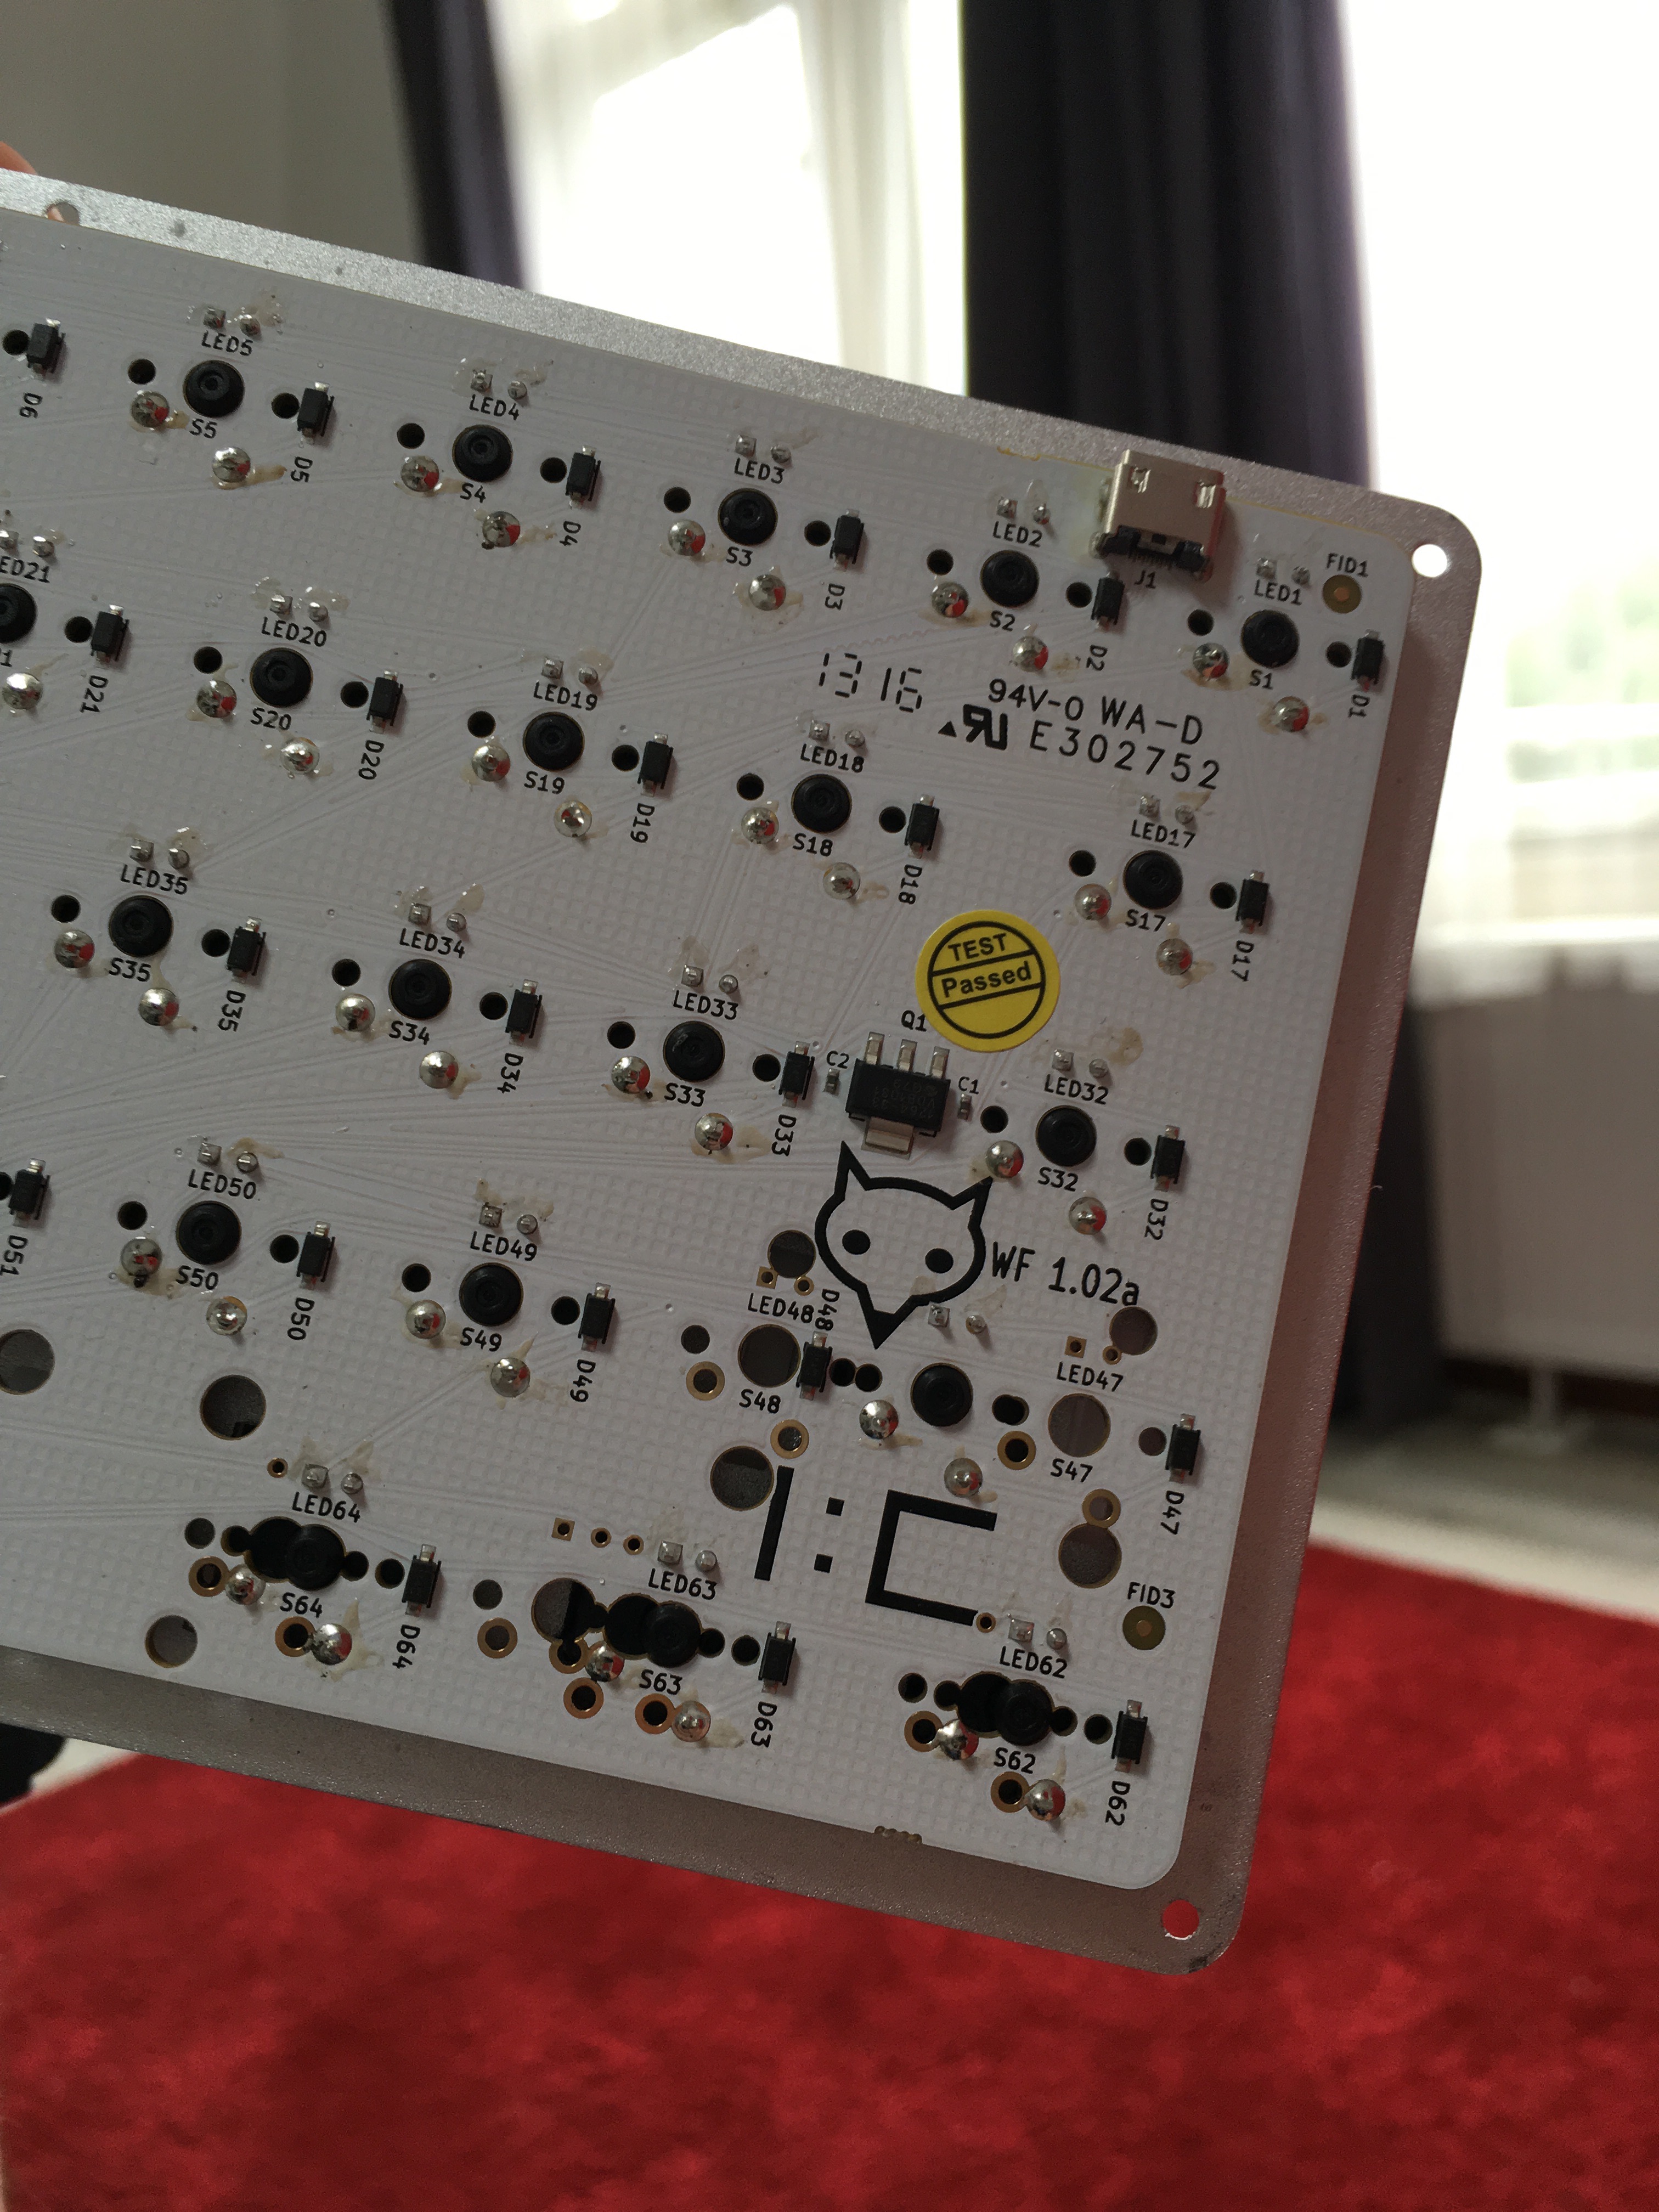
Matt3o signed the bottom of the board, like an artist signing a piece of art.
Setup
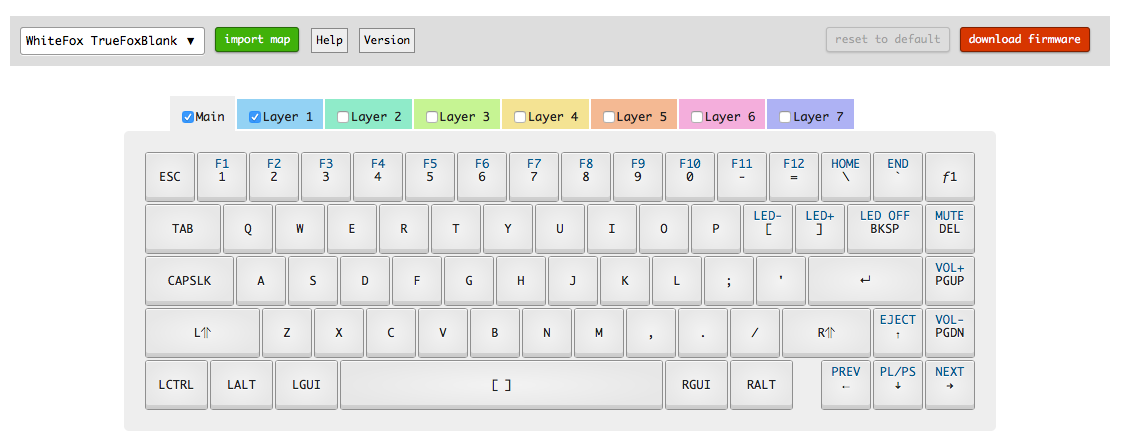
I got a little confused after hooking it up, because some output didn’t match up with the label on the keycaps; the backspace key didn’t remove anything, but added a ‘' on the screen. Luckily this was easily fixed using Input Club’s Configurator.
The Whitefox keyboard comes in a variety of layouts: Vanilla, ISO, Aria, Winkeyless, The True Fox (the one I have) and Jack of All Trades. I think every board comes pre-programmed with the Vanilla layout. I’ve customized the default True Fox setup to include a number of special functions that I use regularly, like: volume, media, LED brightness etc. I’ve also changed the modifier keys to match Apple’s standard. You can get my custom layout on GitHub.
Typing
The typing experience is excellent. I opted for Cherry MX Blue switches, which means they’re loud, but delicious to type on. The aluminium body is sturdy and doesn’t flex, no matter how hard you slam the keys. You can actually hear the key hitting metal when bottoming out a key a little too rough. It feels industrial and built to last.
If you plan on typing in a more crowded environment, I would suggest going with the silent-but-tactile Cherry MX Brown switches.
The keyboard has a hand-built touch. Mine isn’t perfect. There’s a dent in the aluminium on the bottom right corner and one of the screws isn’t as tight as it should be. Nothing I can’t live with, but something to consider if you decide on getting one.
Conclusion
Getting one is not that easy, though. The Massdrop is over and while Input Club lists the keyboard on its website, you can only signup to be notified when they’re available again.
I’ve tried quite a few mechanical keyboards. My previous favorite being the KBParadise V60 I wrote about earlier.
The Whitefox exceeds the KBParadise V60 on every level. The only downside I can think of is its price tag. I joined the Massdrop and ended up spending $217 (€202 on my creditcard bill). I actually expected to pay close to €300 with duties and taxes, but luckily customs let it through. That’s a lot of money for a keyboard, but–like a great mattress–it’s worth it.
I make apps, take a look 👇

Skips terrible music
Denied saves your ears from Nickelback or any other band, song or album. It sees what you're playing and automatically skips songs that you dislike.