I make apps, take a look 👇

Beautiful images of code
Generate gorgeous, highly customizable images from your code snippets. Ready to save or share.
On Dumbphones
My iPhone 15 Pro takes gorgeous pictures and can access any part of my (digital) life whenever I want. It’s also heavy and a distraction when I’m with my kids.
To minimize the negative aspects I’ve disabled everything except the bare necessities using Foqos. I haven’t read a full news article in about a week. My AI Agent sends me the headlines every morning and that’s it. I also block search engines. The phone is barely worth picking up anymore. Now that its weight and size aren’t set off by its usefulness it feels ridiculous to carry around.
That’s why I’ve been on the hunt for an alternative phone. One that’s small and basic but allows me to stay connected; it’s impossible to be completely offline if you have kids.
The Setup
I’m currently running a Punkt MP02 as my daily driver. It’s beautifully designed and feels like a deliberate statement against modern smartphones.

Like any phone it can place calls and send text messages. It’s a step up from dumbphones in that it has 4G LTE, can tether that connection and offers its own implementation of Signal — called Pigeon.
What makes this setup work for me is adding my Apple Watch. I can leave the iPhone at home, enable tethering on the Punkt and use the Apple Watch for essential notifications and contactless payments.
It’s a compromise that feels liberating.
In Reality
The Punkt itself is stunning. It feels premium, the keyboard is satisfying to type on and the tiny screen is appealing to look at. I find myself holding it in my hand for no reason but to feel it.
But there are trade-offs.
Battery life is disappointing. The Punkt barely lasts a full day, which feels backwards for a device that’s supposed to be simpler. If I tether a lot I can turn it into a paperweight in mere hours.
Then there’s typing. Using Pigeon to respond to Signal messages is… not great. The keyboard is tiny, the interface is clunky, and you quickly realize how much you take for granted when you have a full-size touchscreen.
What’s Next
I’ve ordered a Mudita Kompakt in hopes that it’ll solve the battery issue. It’s another privacy-focused phone with a similar philosophy but hopefully better power management. It also has an e-ink display that I’m looking forward to seeing in action.

It’s confronting how cumbersome it feels to walk around with a phone that doesn’t offer much assistance when you’re out and about. The Mudita provides a few extra lifelines: it has a map, a basic camera, flashlight and can even side-load some apps.
Install native arm64 Ruby through rbenv on Apple Silicon
Having recently acquired an Apple Silicon powered MacBook, I noticed the new architecture comes with a few challenges:
- There are no native binaries available for older applications. This includes legacy versions of Ruby, Python and other tools.
- You have to take care to not mix
arm64andx86_64.
These two points combined mean that you might have to upgrade some of your projects. I had to migrate all my websites from Jekyll 3.x on Ruby 2.x to Jekyll 4.3.1 on Ruby 3.1.2.
Fight the urge to try and get your projects running with outdated software. You’ll quickly run into issue number two and be tempted to run your Terminal under Rosetta, like some posts suggest. Please don’t do this. You’ll regret it later.
In this guide I’ll help you install Homebrew, rbenv and a recent version of Ruby all compiled for the
arm64architecture.Setup
Before we get started, make sure you’re not already running your Terminal of choice under Rosetta:
- Right-click your Terminal app.
- Make sure Open Using Rosetta is disabled.
Remove
x86_64installations if necessaryIf you’ve somehow migrated your Homebrew, rbenv or Ruby installations from a previous Intel Mac, you’ll first have to uninstall the
x86_64code.Just to be sure, check if you have any files present under
/usr/local. That’s was the path Homebrew used before. The new path is/opt/Homebrew.rbenv
brew uninstall rbenvCheck if there’s anything left under
~/.rbenv. Get rid of the folder if it’s still there.Homebrew
/bin/bash -c "$(curl -fsSL https://raw.githubusercontent.com/Homebrew/install/HEAD/uninstall.sh)"Install Homebrew
/bin/bash -c "$(curl -fsSL https://raw.githubusercontent.com/Homebrew/install/HEAD/install.sh)"Make sure the following line is present in your
~/.zshrc(or other shell’s config):export PATH="/opt/Homebrew/bin:$PATH"Install rbenv
brew install rbenv readline opensslAdd the following lines to your
~/.zshrc(or other shell’s config):export PATH="$HOME/.rbenv/bin:$PATH" eval "$(rbenv init -)"Install Xcode’s Command Line Tools
You might already have Xcode and its Command Line Tools installed, but there is a chance that rbenv won’t find it.
You can find the standalone release here: https://developer.apple.com/download/all/.
Install Ruby
Add the following to your
~/.zshrc(or other shell’s config):local READLINE_PATH=$(brew --prefix readline) local OPENSSL_PATH=$(brew --prefix openssl) export LDFLAGS="-L$READLINE_PATH/lib -L$OPENSSL_PATH/lib" export CPPFLAGS="-I$READLINE_PATH/include -I$OPENSSL_PATH/include" export PKG_CONFIG_PATH="$READLINE_PATH/lib/pkgconfig:$OPENSSL_PATH/lib/pkgconfig" export RUBY_CONFIGURE_OPTS="--with-openssl-dir=$OPENSSL_PATH" export PATH=$OPENSSL_PATH/bin:$PATH export SDKROOT="$(xcrun --show-sdk-path)"This makes sure the compiler knows where to find all the dependencies it requires.
Now get a list of the most recent Ruby versions:
rbenv install --listOutput:
2.6.10
2.7.6
3.0.4
3.1.2
jruby-9.3.9.0
mruby-3.1.0
picoruby-3.0.0
rbx-5.0
truffleruby-22.3.0
truffleruby+graalvm-22.3.0

Only latest stable releases for each Ruby implementation are shown.
Use 'rbenv install --list-all / -L' to show all local versions.
Depending on when you run this command the output will be different. Just pick the latest release.
If you need Ruby 2, you might have to install OpenSSL 1.1.x. To do this, change every mention of
openssltoopenssl@1.1. So,brew install openssl@1.1andlocal OPENSSL_PATH=$(brew --prefix openssl@1.1).To install Ruby 3.1.2:
rbenv install 3.1.2Hopefully the command will now complete successfully and you’ll be able to use Ruby. To make it the default on your system use this:
rbenv global 3.1.2That’s it. All done. 🥳
Fix Windows 10 2004 update Blue Screen on Corsair ONE
TL;DR: Install the latest version of Corsair Link to fix the issue.
Microsoft recently released the 2004 version update for Windows 10. It includes a bunch of cool new features, like WSL 2 which integrates Linux even better into the Windows operating system.
I immediately jumped at the opportunity to install the update when it presented itself, only to be disappointed during the installation. It repeatedly failed with a BSOD mentioning
cpuz141_x64.syscaused aPAGE_FAULT_IN_NONPAGED_AREA.At first I was confused, because I wasn’t aware a CPU-Z driver was installed at all. After some digging I discovered it’s used by the Corsair Link utility installed on all 2017/2018 Corsair ONE models.
Corsair Link is mandatory as it’s solely responsible for updating the fan speeds while the system is in use. Without it the computer will overheat. A terrible depedency I wasn’t fully aware of when I bought the machine.
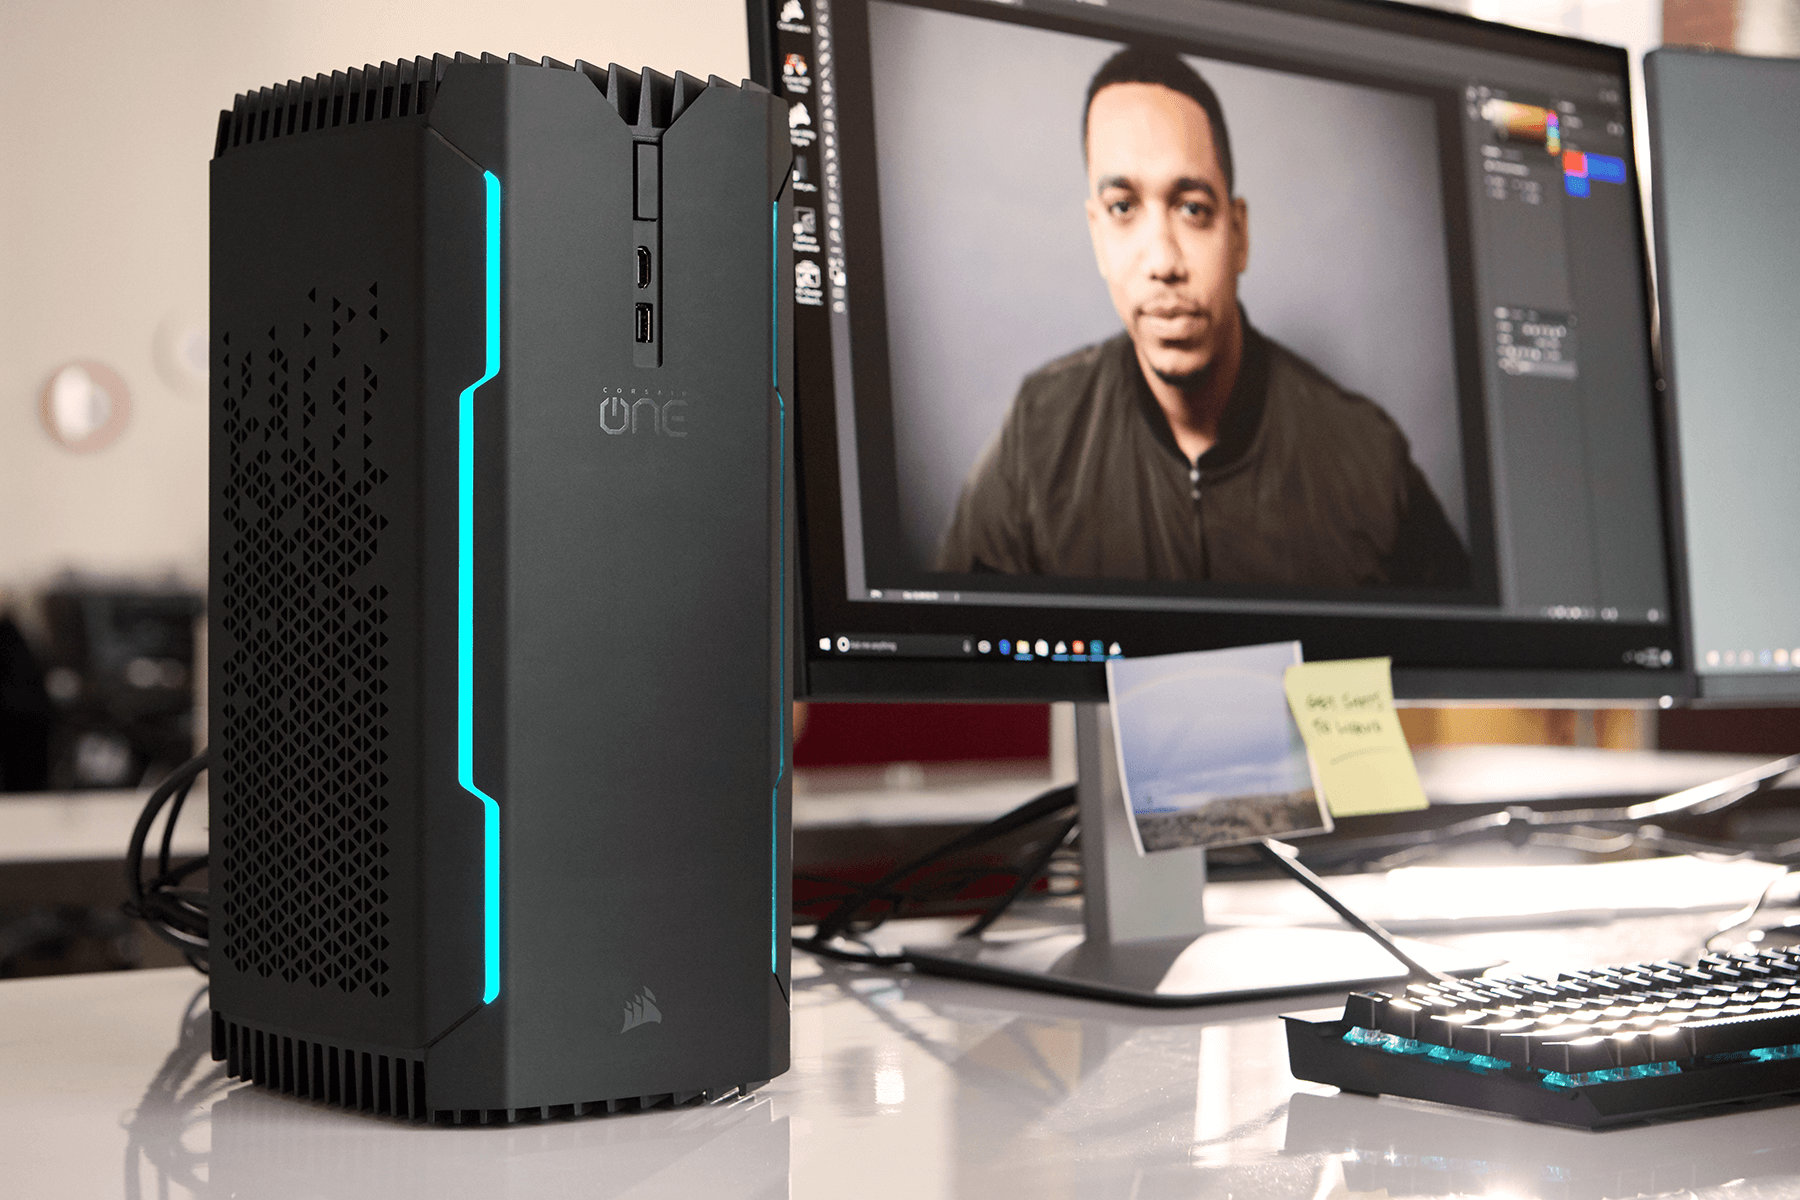
It’s pretty though and fast.
The in-app update mechanism for Corsair Link promised me I was running the latest version. That was concerning. It suggested I might not be able to install the 2004 update at all. Luckily I came across this topic on the Corsair forum: CORSAIR LINK 4.4.4.9 for CORSAIR ONE (2017/2018). Posted in 2018 it provides a download link to an updated version of Corsair Link. Why this version isn’t available through the in-app updater is unknown to me.
After installing the newer version, Windows continued the OS update without a hitch. 🥳
Fix 'broken' iPad Pro (2nd gen) Smart Keyboard Folio
My Smart Keyboard Folio has been unresponsive for months. I was almost getting ready to trash it. Every time I folded it into position, the onscreen keyboard slid up as if a physical keyboard wasn’t connected at all.
It was attached though and I tried everything to get it to work:
- Force-rebooting my iPad with the keyboard disconnected, then connecting it afterwards. Didn’t work.
- Cleaning the contacts with alcohol and a clean cloth. Didn’t work.
- Nudging it from the bottom left or right corner. Worked at first, then nothing.
The problem manifested over a few weeks, getting worse every day. I thought the ribbon cable had been damaged. Nothing I could do to fix it.
Then I tried bending the magnets that snap the keyboard into place. 🧲
I couldn’t believe it at first, but the problem was resolved instantly. After folding and unfolding it several times it still works. I’m actually typing this article on it.
The trick is to bend the magnets slightly towards where it connects with the iPad. Don’t overdo it, just curve them up a tiny bit. I can’t even see the difference on mine, but the effect is there.

So, if you’ve ruled out all software-related issues, you might want to give this a go. Let me know if you got yours working again too!
Note: I’m not responsible for any damage you cause to your keyboard. Be careful and use common sense.
VMWare Fusion 10 on macOS Catalina
This post is for those of us running an older version of VMWare Fusion on macOS Catalina. VMWare Fusion 11.5 supports macOS 10.15 out of the box.
I use VMWare Fusion 10 to test my apps on previous and future versions of macOS. Since this fall, that’s become problematic. The screen remains blank when I start one of my virtuals on Catalina. Oddly enough the preview in the virtual machine overview works fine.
Catalina requires apps to request permission for various tasks. Recording the screen is one of them. Apparently Fusion uses this feature, but neglects to ask for permission. Thus the screen stays black.
Some people found a way to get around this by granting permission manually. Here’s how that works.
⚠️ Note that this requires running Terminal commands in Recovery Mode. Make sure you’re comfortable with these steps. I don’t offer any support and am not responsible if things don’t go as planned. ⚠️
Create the script
Create a new script file where you can easily access it. I recommend
/tmp/fixfusion.sh. Paste in the following:#!/bin/sh # Change the following to fit your system root="/Volumes/Macintosh HD" "$root/usr/bin/sqlite3" "${root}/Library/Application Support/com.apple.TCC/TCC.db" 'insert into access values ("kTCCServiceScreenCapture", "com.vmware.fusion", 0, 1, 1, "", "", "", "UNUSED", "", 0,1565595574)'Enter Recovery Mode
Enter Recovery Mode by restarting your Mac and holding down
⌘+Rwhile it boots.Start a Terminal window by selecting
Utilities→Terminalfrom the menu bar when you’ve reached Recovery Mode.Unlock your disk if necessary
If your primary drive is encrypted using FileVault (it should be), unlock it first by running the following command:
diskutil apfs unlock "Macintosh HD"(Again, adjust the command if your disk isn’t called “Macintosh HD”.)
Enter your passphrase when it asks for it.
Run the script
You can now run the script you created earlier:
sh "/Volumes/Machintosh HD/tmp/fixfusion.sh"It’s supposed to not show any output. If there’s no error, it worked.
Reboot
Check
System Preferences→Security & Privacy→Privacy→Screen Recordingand you’ll notice VMWare Fusion has the permission it needs.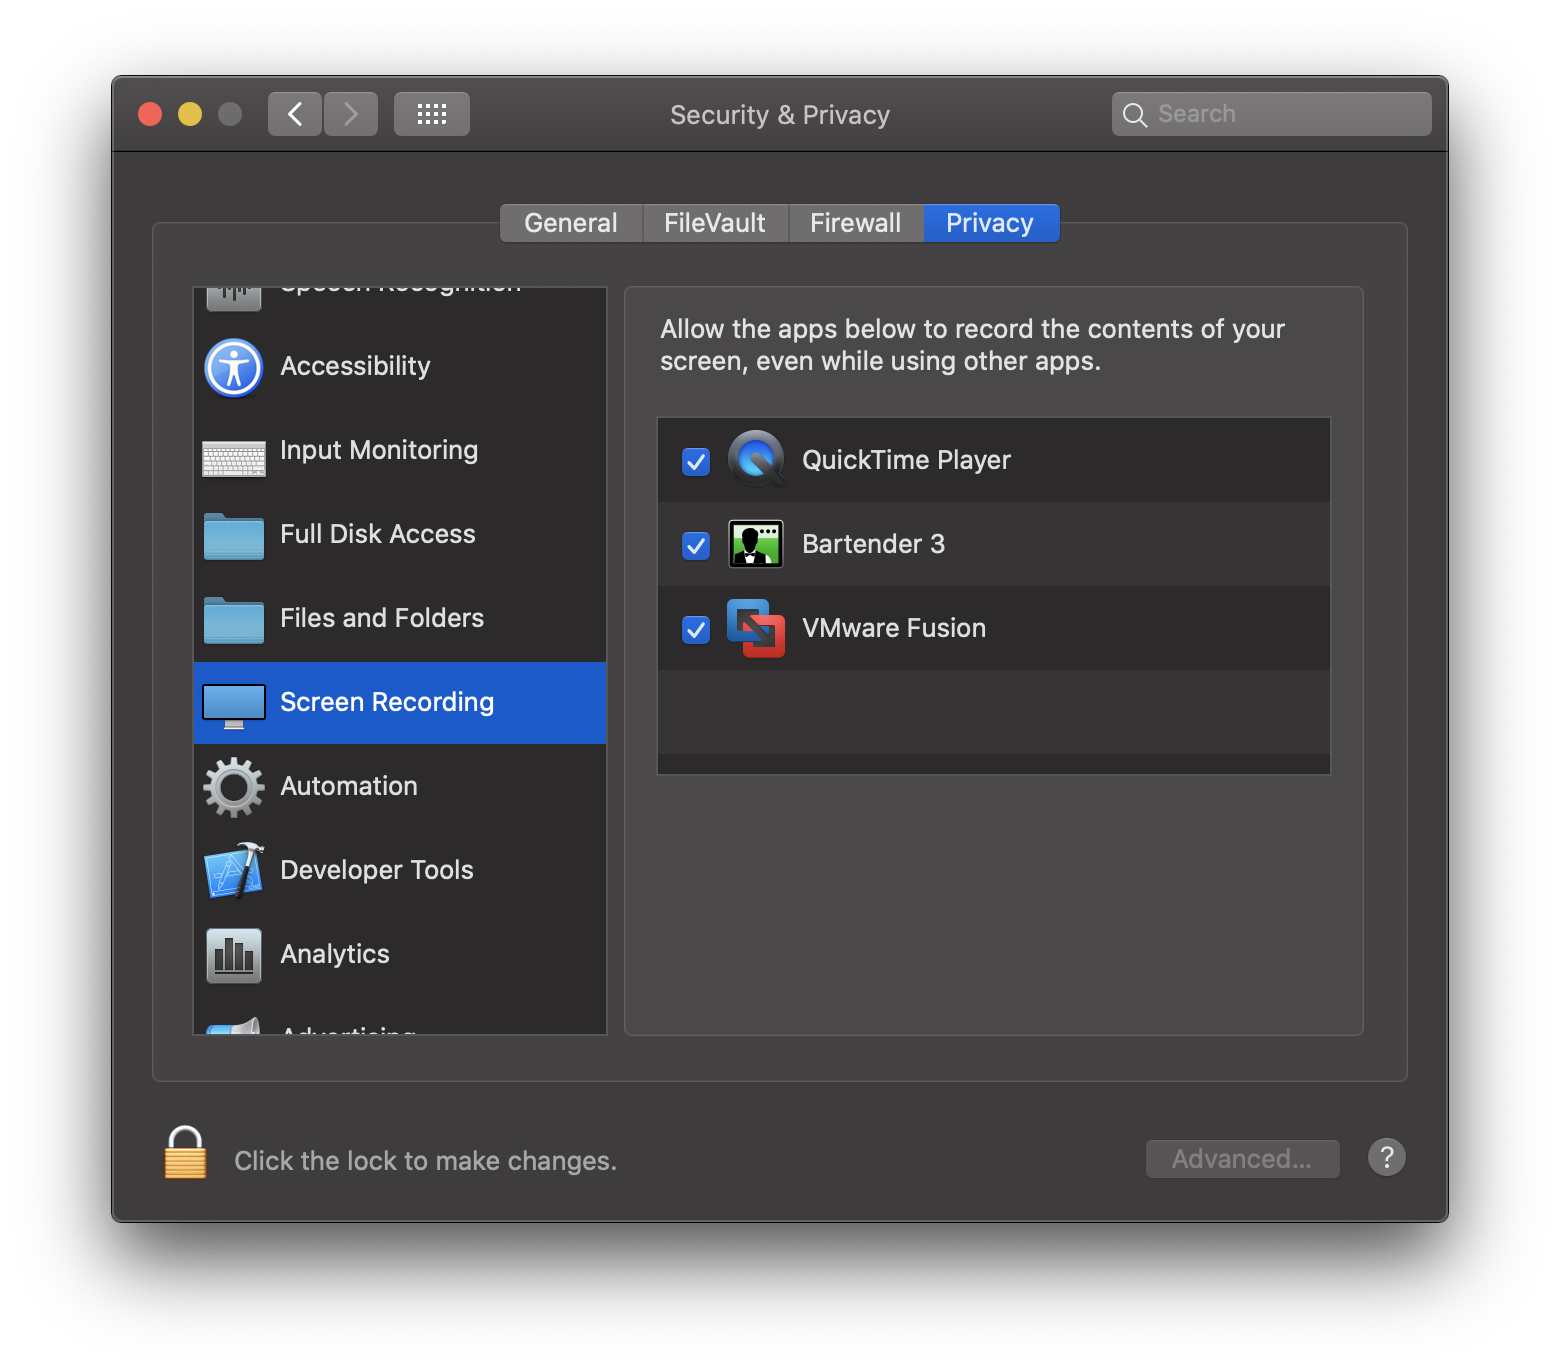
That’s it. Your virtual machines should properly work again. 🥳
I make apps, take a look 👇

Skips terrible music
Denied saves your ears from Nickelback or any other band, song or album. It sees what you're playing and automatically skips songs that you dislike.