Creating an Alfred 2 Workflow With Ruby
Alfred is a tool that I use literally dozens of times a day. Every time I launch an app, clone a git repo, search on Google et cetera. It’s a productivity tool like no other. One of its coolest features is the ability to create your own productivity boosters, by making (and sharing) ‘workflows’.
I recently made a workflow that adds keyboard controls to Reign, the Spotify remote that works on any device with a browser.
As Alfred’s own documentation can be somewhat lacking around workflows, I thought I’d share my experience. As such, this is by no means a definitive guide, just some things I learned in the process.
Getting to know workflows
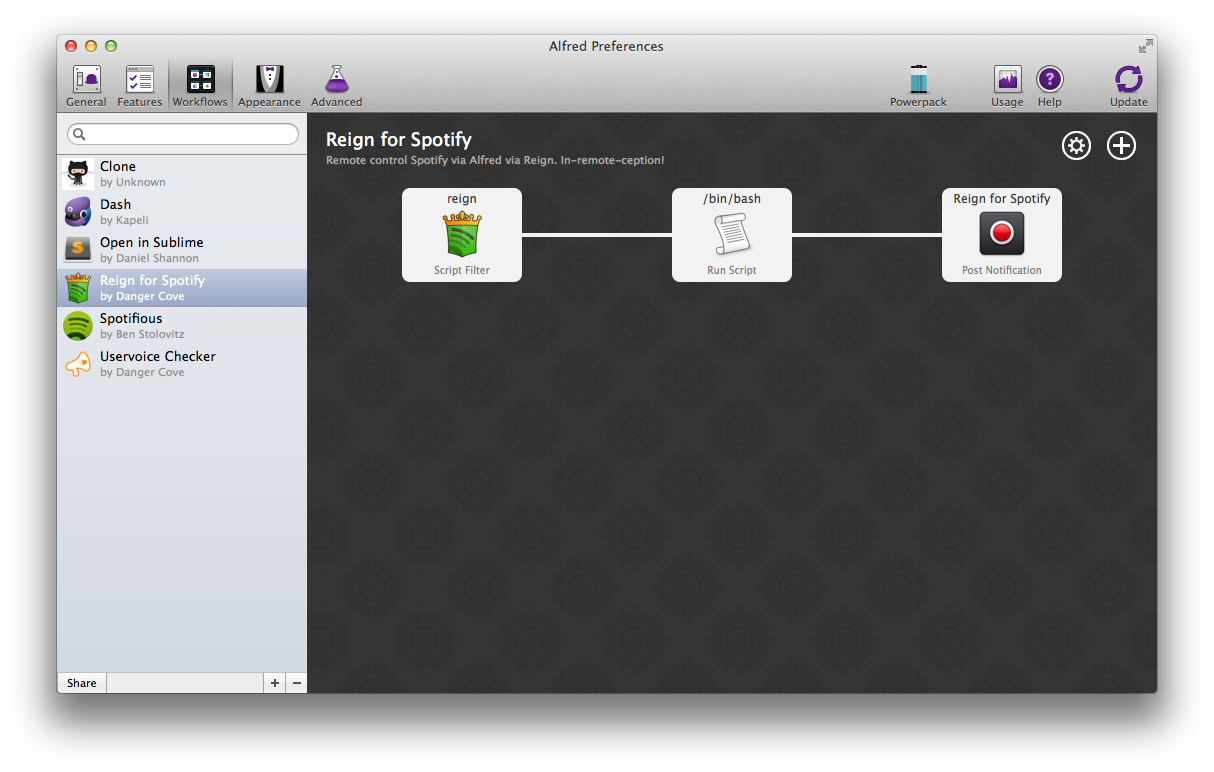
While Alfred 2 if free, you’ll need the Powerpack to be able to create and import workflows. So get that, if you didn’t have it already.
A basic workflow gets some input, performs an action and optionally shows some output. Alfred passes the return value of each of these steps to the next. Additionally you can activate a workflow using a trigger, like a hotkey or file action. While the workflow is active, it can use Alfred’s interface to show feedback, like preset actions or autocomplete suggestions.
Simple workflows can be a matter of dragging and dropping the right components on the canvas and connecting the dots. The solution I was after required some scripting though. This is where Alfred really shines, with support for Bash, Zsh, PHP, Ruby, Python, Perl and osascript (Apple Script).
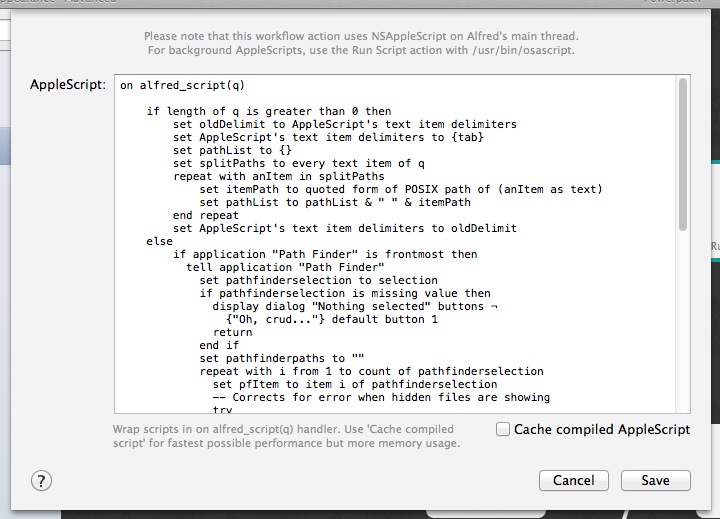
You can write scripts directly into the text area, but when things get a little more extensive it’s probably easier to use a Bash script to invoke your script.
Using a template project
I chose Ruby because I wanted to take advantage of its network and JSON parsing capabilities. Some of these features are contained in gems that might not available on every Mac without installing them first. It’s quite easy to install Gems locally and include them with your Ruby project, but I was hoping to find a tool that does this work for me and could provide me with some wrapper functions around Alfred specific functions.
After some digging around I discovered Zhao Cai’s alfred2-ruby-template. This template contains everything you need to include gems with your workflow and actually streamlines the development process a great deal. I won’t go over the entire setup process here. Zhao has explained pretty much all of it in the Quick Start Guide section on the GitHub page mentioned before.
Goal
To put this walkthrough in some perspective, these were the goals I had for the workflow.
- Activate by entering a specific keyword;
- Find/set/save the ip address/hostname and port for the Reign server;
- Execute play/pause/next/previous commands;
- Show ‘Now Playing’ information;
- Open the current track in a local Spotify client.
All these features are available through Reign’s API, by accessing specific URLs.
http://[ip/hostname]:[port]/playpause = Toggle play/pause
http://[ip/hostname]:[port]/next = Next song
http://[ip/hostname]:[port]/previous = Previous song
http://[ip/hostname]:[port]/nowplaying = Returns the artist and title for the current track
http://[ip/hostname]:[port]/status = Returns a JSON response with more song information (including a Spotify URI)
The actual workflow (finally..)
Alright, with all the context in place, let’s get to work on the workflow! You can get the full source for this workflow on GitHub.
Edit your workflow description
After following the template setup, you should have a folder containing your workflow and an empty canvas in Alfred.
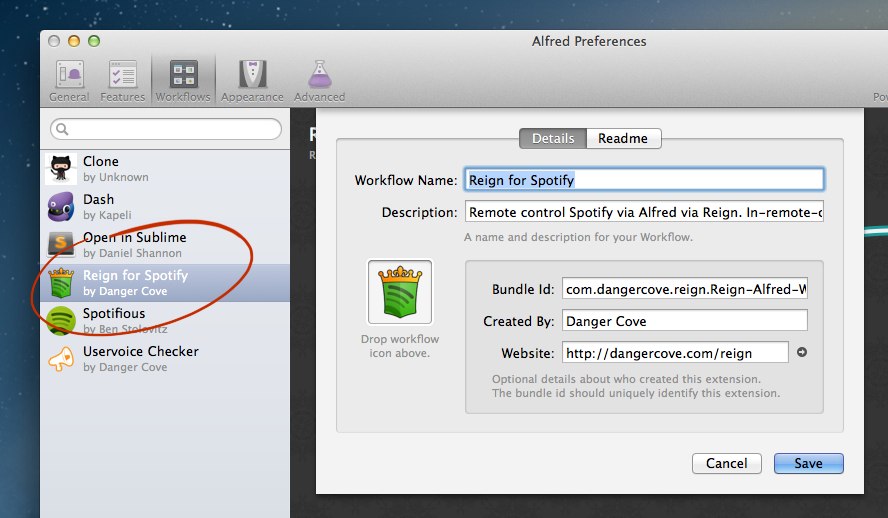
Start off by entering some information about your workflow. Double-click your workflow in the overview on the left to do so.
Setup the workflow input
To activate the workflow I wanted to use the keyword reign. As soon as I type that into Alfred, a script should run. Alfred provides a component called a Script Filter that does just that. Add it to the canvas by clicking the circled + in the top right corner and selecting Inputs → Script Filter.
Take a look at the Script Filter that activates the Reign for Spotify workflow.
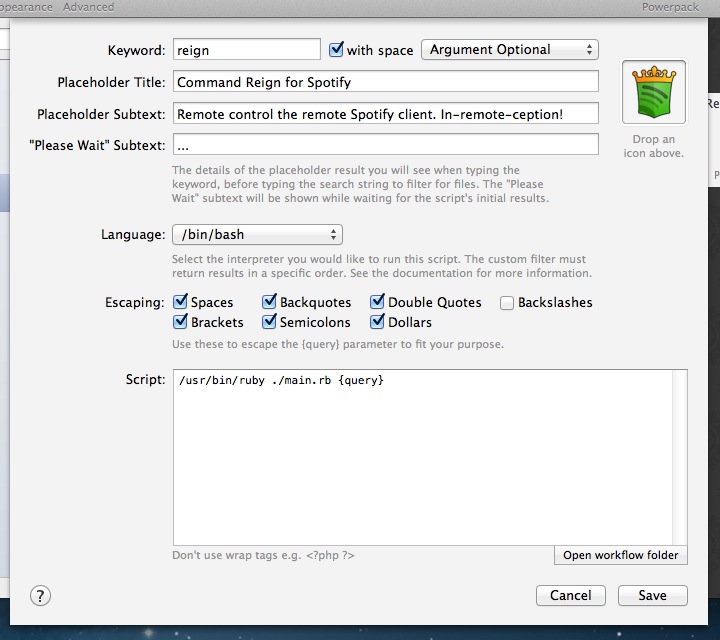
The most important field is the Keyword, which will trigger the scripts. I wanted the workflow to complete several tasks (e.g. play/next/previous) and used an argument to accomplish this. To learn more about how arguments work, read this post on Alfred’s forums.
You’ll notice that I didn’t set my language to Ruby, but to Bash. This allows me to enter a Bash command that runs a Ruby script. I can then edit the script using my favorite editor.
In this article I want stay away from the code as much as possible (it’s available on GitHub if you want it), but I want to point out two things that cost me some time to learn.
Storing settings
For my workflow to work, I need to know the host that will receive the commands via HTTP. I could add a script to discover hosts using Bonjour (like Reign does), but that would complicate thing a lot. I chose to just ask for the data and store it, through Alfred.
Zhao (from the Ruby template, remember) thought of this and provides a way to save and load settings. Here’s what it looks like.
Alfred.with_friendly_error do |alfred|

  # Save settings
  alfred.setting.dump({ "host", value })

  # Load settings
  settings = alfred.setting.load
  puts settings['host']

end
Feedback
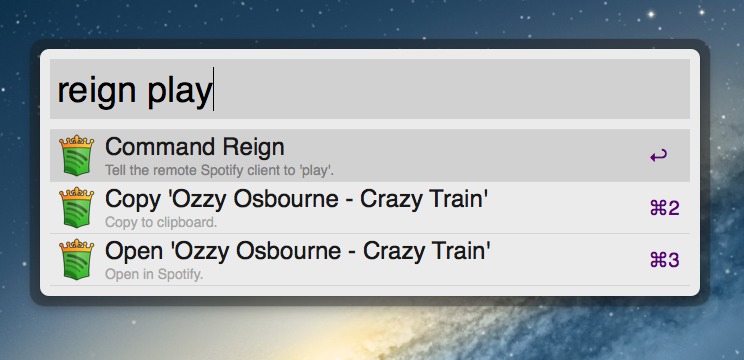
You can pop-up options in Alfred, while typing. Like “Copy ‘Ozzy Osbourne - Crazy Train’” in the screenshot at the start of this article. This is called feedback and frankly is quite cool.
Alfred.with_friendly_error do |alfred|

  fb = alfred.feedback

  fb.add_item({
    :uid      => "",
    :title    => "Copy '#{np}'",
    :subtitle => "Copy to clipboard.",
    :arg      => np, # This gets passed as 'output' when the user selects the item
    :valid    => "yes"
  })

end
After the user selects one of these options the assigned arg gets passed to the next item in the workflow.
Caveat: one thing I noticed was that when you pass user input in the arg it might not ‘be there’ instantly if the user presses return too soon. Still looking for a way around that.
Sharing
To share your workflow with others, right-click it and select Export. This will save your workflow as an .alfredworkflow file. Others can add this to their setup by simply double-clicking it.

Add your workflow to the list on Alfred’s forums. Try to spot Reign’s entry. Also consider putting it up on GitHub.
Updating
While you continue to work on your workflow, you’ll want people to be able to update to the latest version. There’s currently no official way to go about this, but Alleyoop gets the job done.
I make apps, take a look 👇

Beautiful images of code
Generate gorgeous, highly customizable images from your code snippets. Ready to save or share.