I make apps, take a look 👇

Beautiful images of code
Generate gorgeous, highly customizable images from your code snippets. Ready to save or share.
Instalike
We had a Saturday Night of Awesome this weekend and came up with the idea to create an iPhone and Android app that allows you to share images to Facebook very quickly. A few hours later both apps were done and the Android app is already live.
The iPhone App will be released as soon as Apple approves it.

Description:
With InstaLike you can ‘like’ everything you see, instantly!
Just start the app, point your camera and shoot. The image will be uploaded to Facebook directly, for all your friends to see .
InstaLike allows you to share your pictures as fast and easy as possible.
Download it and let me know what you think!
Google Apps Script: TTResponds
Introduction
TTResponds is a Google Apps Script that allows you to automatically send a confirmation to people who’ve filled out a Google Form.
It’s been available for a while in the Script Gallery, but I haven’t gotten around to write about it. The reason I’m doing so right now, is because I’ve received a couple of returning questions that I can probably better answer right here.
Installing
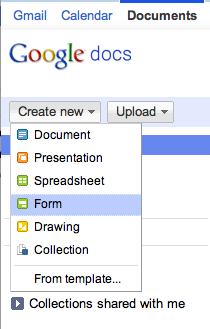
First login to your Google Docs environment, docs.google.com and Google Apps both work fine. After that, choose to create a new Form.
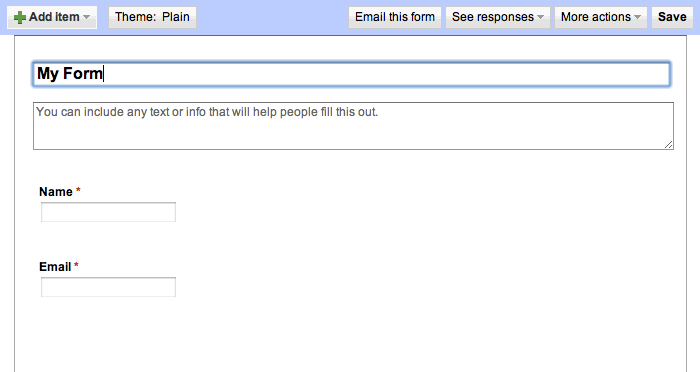
This will present you with a pop-up that allows you to customize the fields. For basis functionality it should at least contain a name field first and an email address second. After that you can add anything you want.
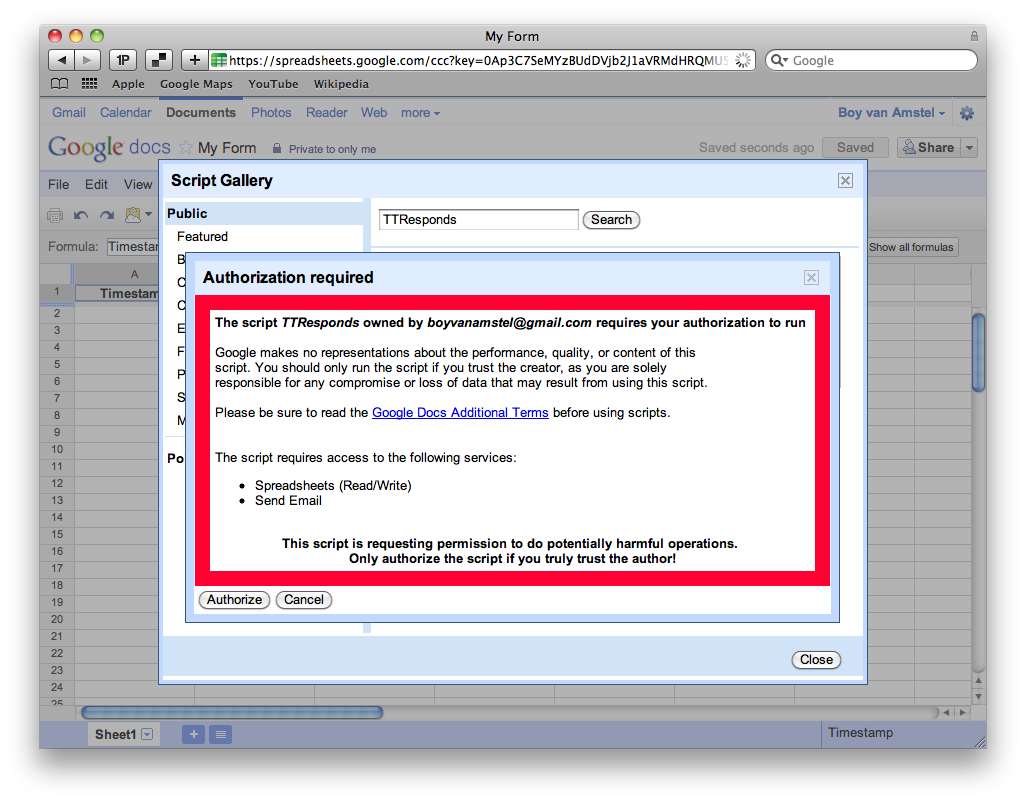
Clicking save will send you to the Spreadsheet, setup to receive form submissions. The next step is to add TTResponds. You can do so by clicking ‘Tools’ and then ‘Script gallery…’.
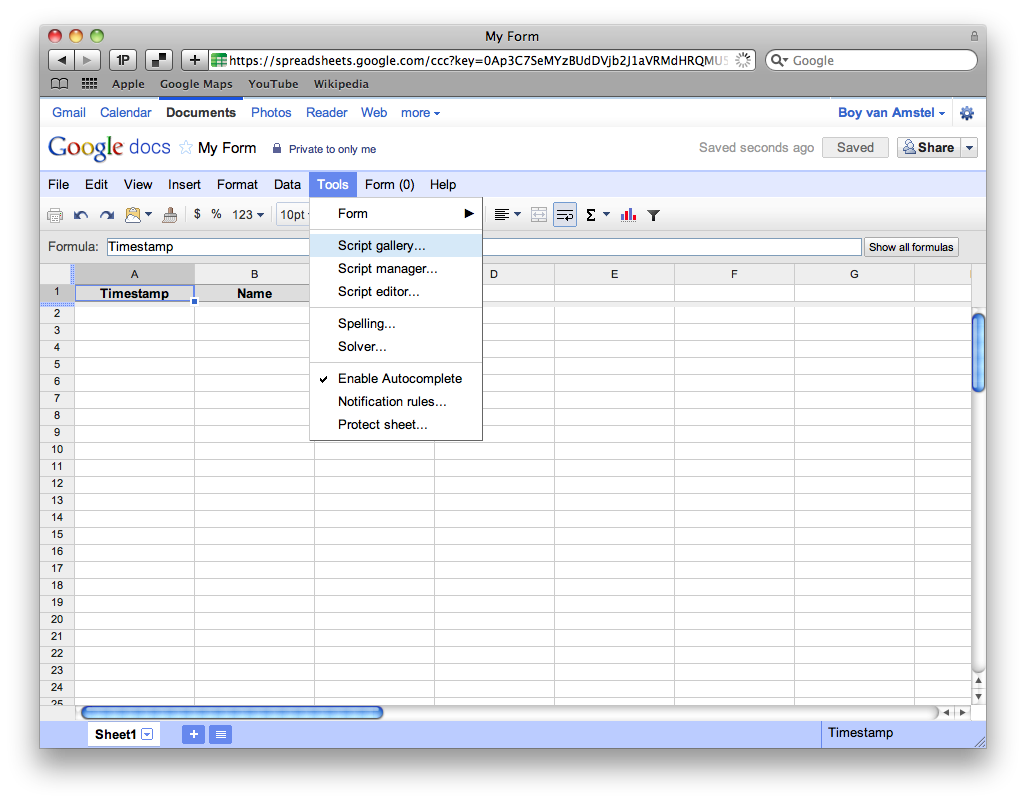
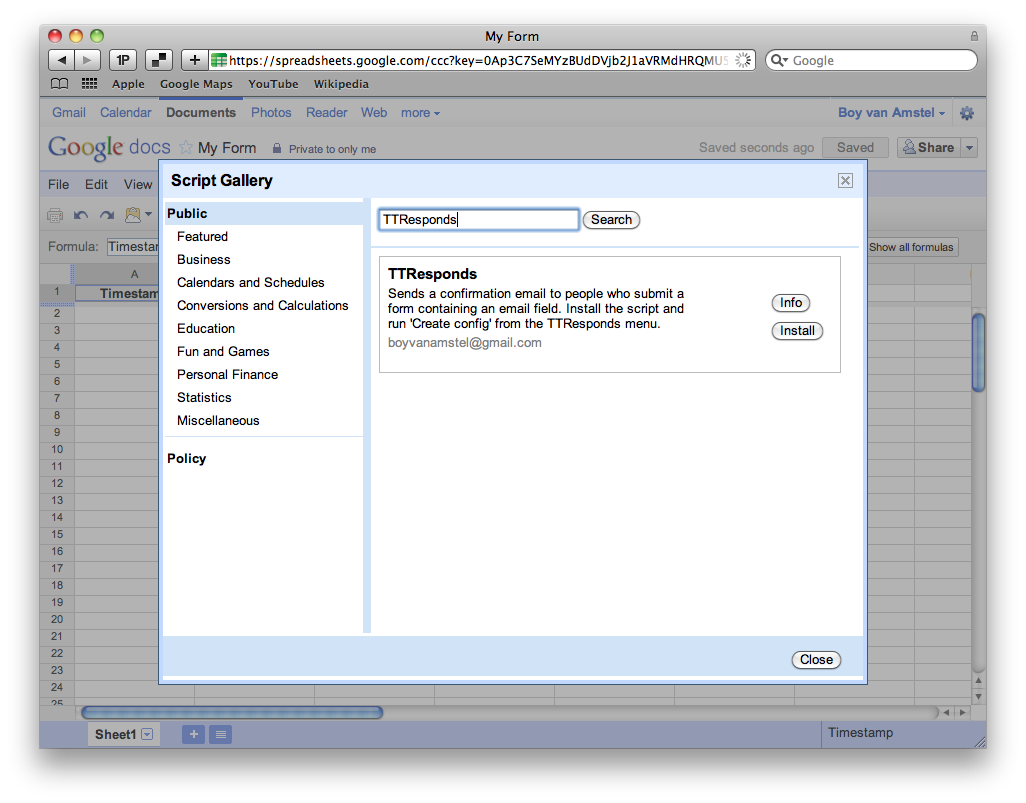
Search for ‘TTResponds’ and click install.
Authorize the script to read your Spreadsheet and send out emails.
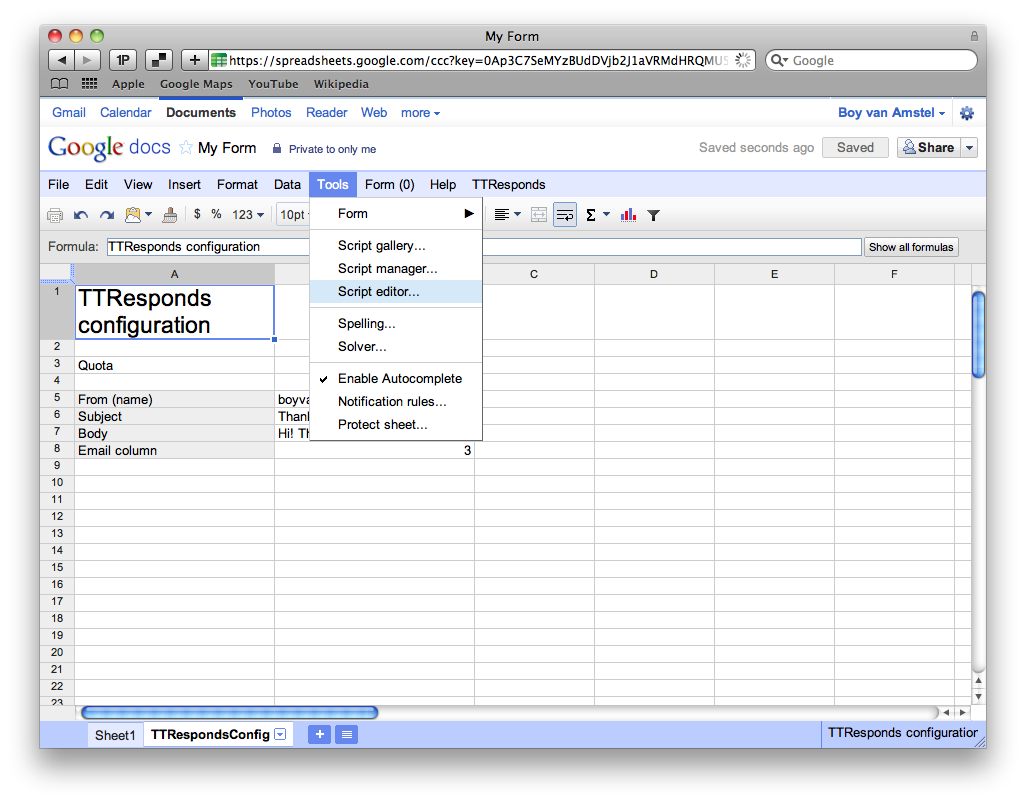
A new menu item called ‘TTResponds’ just appeared. Click it and select ‘Create config’. This should add an extra sheet called ‘TTRespondsConfig’, you can change the properties to provide a more relevant response. After you’re done, make sure all ‘Triggers’ are setup correctly by clicking ‘Tools’ and after that ‘Script editor…’.
In the pop-up select ‘Triggers’ and then ‘All your triggers…’.
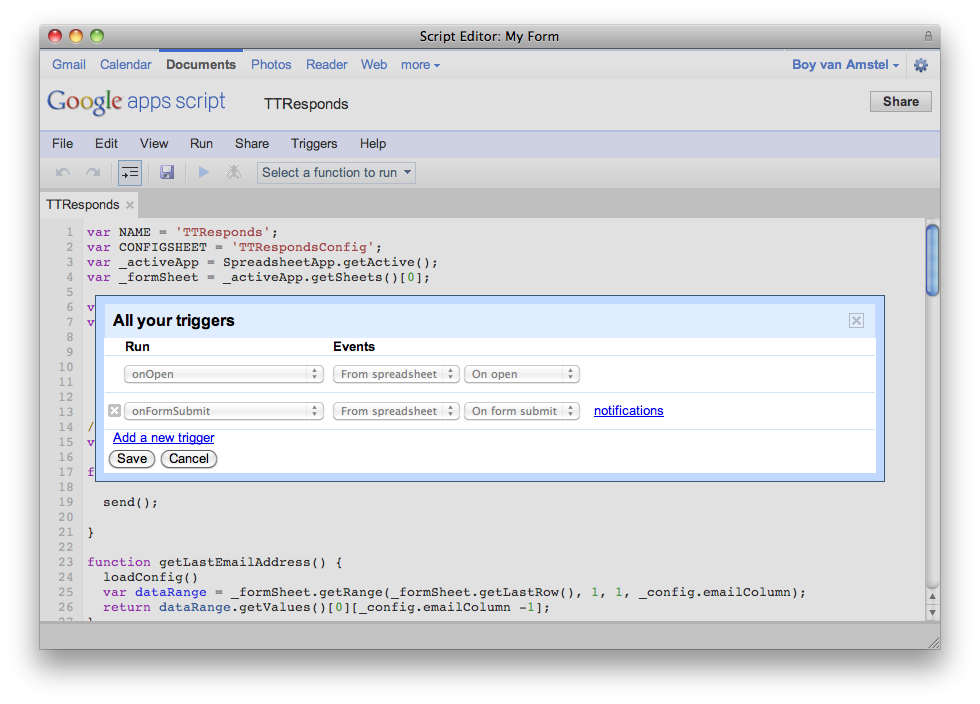
Make sure your setup looks like the image above. If it doesn’t, click ‘Add a new trigger’ and set it to ‘onFormSubmit’, ‘From spreadsheet’ and ‘On form submit’. That’s it! Fill out your own form and you’ll receive a confirmation automatically!
HTML Email
Per default the script sends text-only emails. You can change this to HTML email pretty easily (I’ll probably add it as an option in an update). First open the script editor again and navigate to line 119.
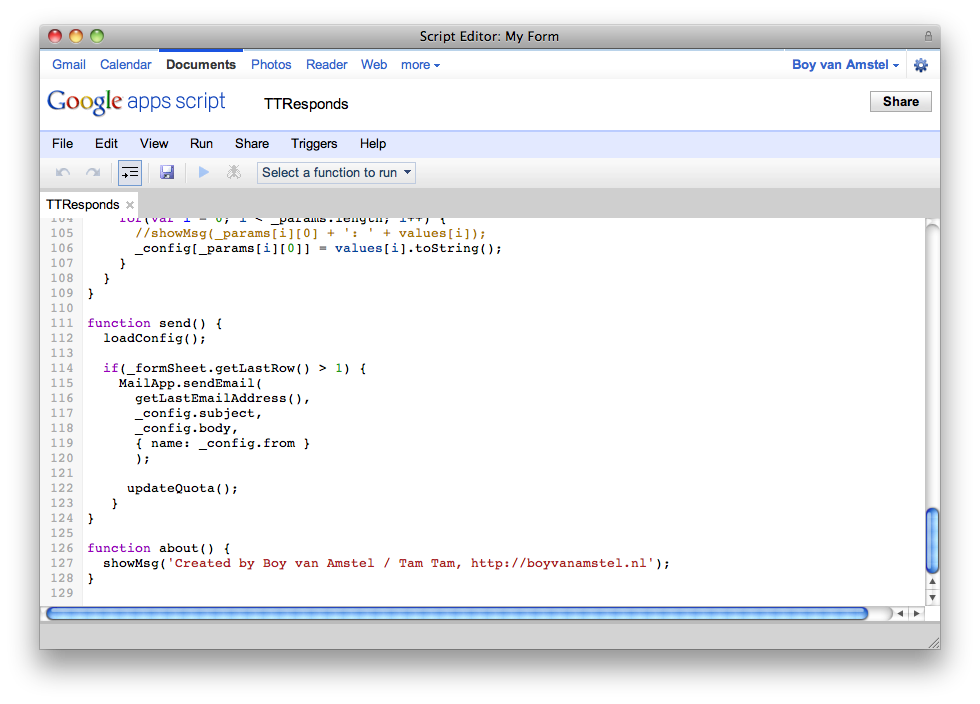
You’ll see that is says:
{ name: _config.from }Change it to this:
{ name: _config.from, htmlBody: _config.body }The script will now send the confirmation as HTML, allowing you to send a fancier response .
Collaborating
I’ve created a GitHub repo for TTResponds. If you’re adding features, or fixing bugs, please fork the project and send me a pull request.
Let me know
It would be awesome if you let me know if you use and/or like the script through the comments, thanks!
Omniauth + Facebook = OpenSSL::SSL::SSLError
I’ve run into this issue twice and now I’m writing down the solution. When authenticating with Facebook via Omniauth, my server always fails with the following error:OpenSSL::SSL::SSLError (SSL_connect returned=1 errno=0 state=SSLv3 read server certificate B: certificate verify failed):This is easily fixed by adding the following to one of the initializers:OpenSSL::SSL::VERIFY_PEER = OpenSSL::SSL::VERIFY_NONEIt’s probably not the best solution, as this turns off SSL peer verification..A better solution:
http://stackoverflow.com/questions/5711190/how-to-get-rid-of-opensslsslsslerror
Hip Like Heroku
Usually I deploy projects on my physical server, located at the server park called “former bedroom at my parents’”. This allows me to see how a project develops and migrate to a better server (which costs more money) if it’s successful. This is also the case for hiplikejapie.nl.
I’ve been deploying a couple of experiments to Heroku and the platform really appeals to me. Deploying itself is a breeze and the “add-ons” model is pretty cool. Also, it’s free if you can manage with a 5mb database, 1 dyno en 0 workers. Projects in a developing stage usually do. I’ve never launched a project from it though. Primarily because I don’t want the to run into insane hosting costs if something like Please Rob Me happens. In any case the ability to scale a project and not worrying about server setup and stuff is awesome.
Hip Like Japie hasn’t really took off (yet?), but is doing mildly ok with a bunch of visitors every day. It being a finished product made it interesting for me to see how well it would deploy.
I’ve got Heroku’s command line tool installed, but if you haven’t install it like this:
$ sudo gem install herokuNext you need to setup a Git repository for your project if you haven’t already.
$ git init
$ git add .
$ git commit -m 'initial import'
Let Heroku add it’s remote.
$ heroku createLogin with your Heroku credentials and you’re done setting up!
This would usually be the point where you start developing your application, but Hip Like Japie being already done allows me to skip directly to deploying.
$ git push heroku masterDid you see what they did there? They just added a new remote, super nice. Anyway, this should start deploying the app. After it’s done, migrate the database.
$ heroku rake db:migrateI thought about looking online for correct settings to Heroku’s database setup, but decided to just run rake and see what happens. Turns out that Heroku just made it work. My production setup was set to use Sqlite3, but Heroku automatically changed it to their PostgreSQL database.
Technically I was done, but opening the website would give me an error. Crap, something went wrong. You can check the server’s log by issuing the following command:
$ heroku logsThis showed me that a database query failed, due to running on PostgreSQL instead of Sqlite3. I applied a dirty little patch.
if ActiveRecord::Base.connection.instance_values["config"][:adapter] == 'postgresql'
  @comparisons = Comparison.find_by_sql(
      "SELECT * FROM (SELECT DISTINCT ON (username) * FROM comparisons ORDER BY username, id DESC) foo ORDER BY id DESC LIMIT 10"
      )
else
  @comparisons = Comparison.all(
      :order => "id DESC", :limit => 10, :group => 'username'
      )
end
After that the site worked fine: hiplikejapie.heroku.com. There’s an add-on that allows you to hook up your custom domain name to the project. It’s conveniently called “Custom Domains” and can be used via the command line.
$ heroku addons:add custom_domainsThis may prompt you to verify your account, by entering your creditcard details (on Heroku’s website, not the command line). After that you’re ready to add your domain names.
$ heroku domains:add www.hiplikejapie.nl
$ heroku domains:add hiplikejapie.nl
I added both the domain and the www. sub-domain. To activate this, you need to change your domain’s DNS settings. It comes down to adding three A records and a CNAME.
@ A 75.101.163.44
@ A 75.101.145.87
@ A 174.129.212.2
www CNAME proxy.heroku.com.
That’s it, hiplikejapie.nl points directly to Heroku, awesome!
EDIT:
The website failed if the worker would spin down. The error logs showed that Compass couldn’t compile the Sass files. Which is obvious as Heroku is read-only. This line in config/environments/production.rb fixes it:
Compass.configuration.sass_options={:never_update=>true}Improve Javascript code quality with JSLint
Created a tiny project on GitHub with a simple piece of Javascript to see what JSLint does.
“JSLint is a JavaScript program that looks for problems in JavaScript programs. It is a code quality tool.” – JSLint.com
Pretty cool and something I’ll definitely incorporate in deploy scripts. Checkout the example website here and the GitHub repo here.
I make apps, take a look 👇
Beautiful images of code
Generate gorgeous, highly customizable images from your code snippets. Ready to save or share.